E-Tickets & Check-in
This guide walks through the full attendee flow, from checkout to entrance scanning. It is written for organizers and front-of-house staff so you know what attendees receive, what your team sees, and how the check-in process works on event day.
1. Purchase Flow
When an attendee opens your event page, they choose a ticket, fill in their contact information, and complete checkout.
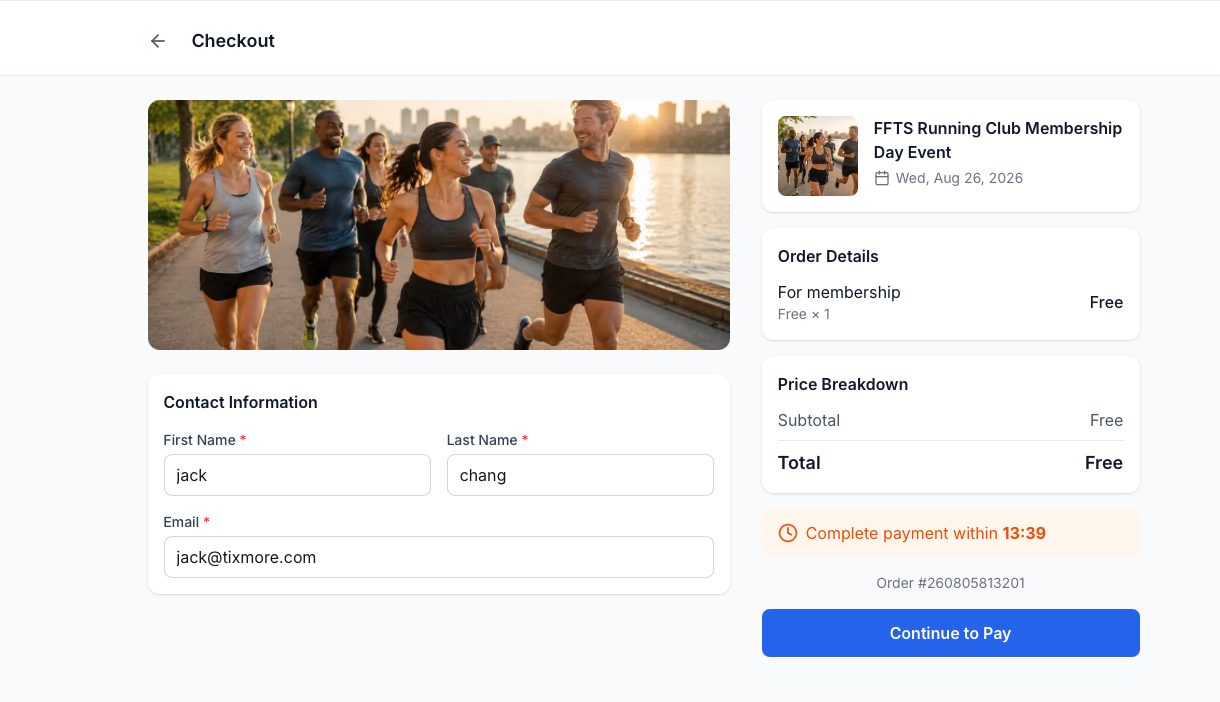
Free tickets use the same flow. The only difference is the price shown at checkout:
- Paid tickets show the ticket price and any applicable fees
- Free tickets show
Freeand still create a real order and ticket
After checkout, the attendee is taken to the order page.
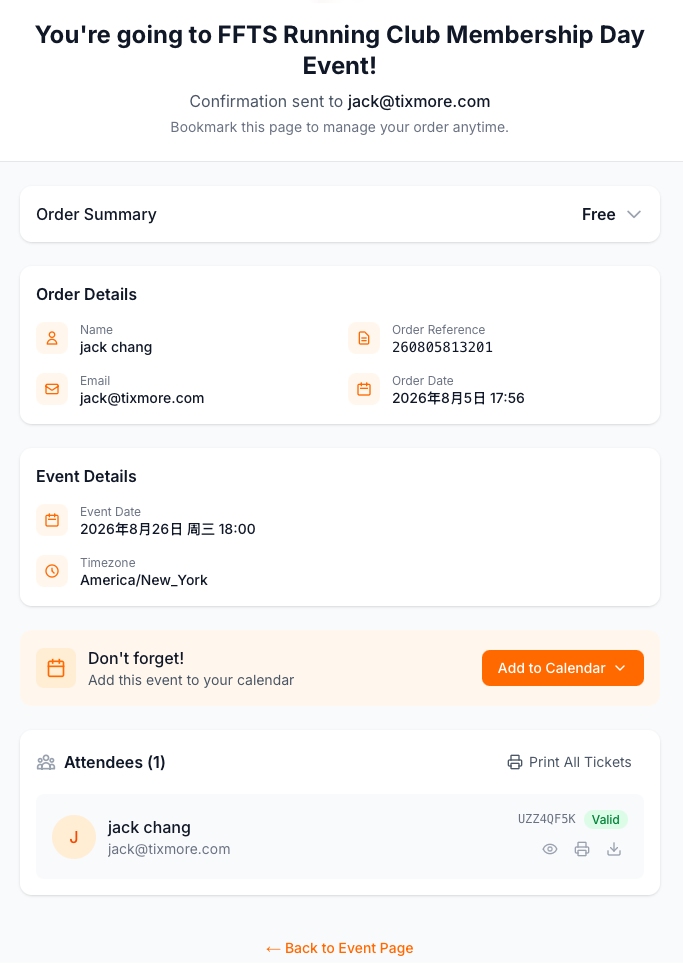
The order page gives the attendee one place to review the order, confirm the event details, and access each ticket. This is also the page they can bookmark if they need to come back later.
2. What the Electronic Ticket Looks Like
Each attendee receives an electronic ticket with a QR code, ticket ID, attendee name, event time, and order reference.
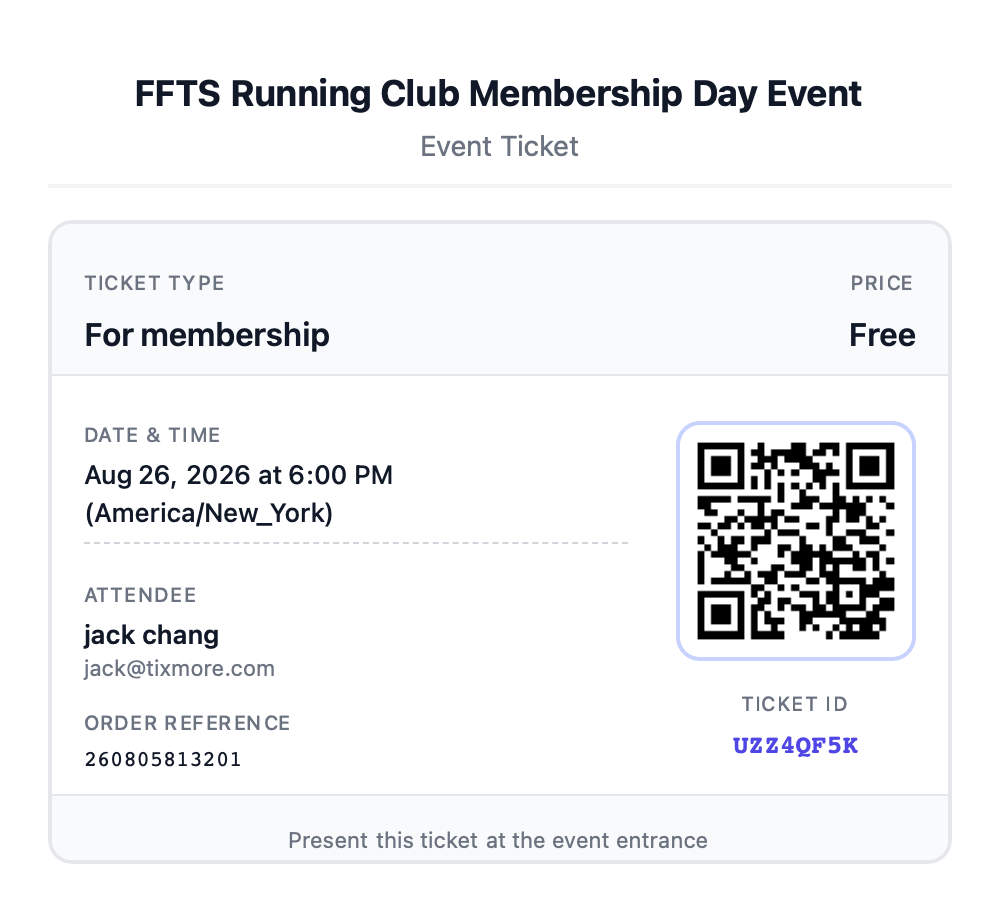
The ticket can be shown on a phone or printed in advance. For most events, the QR code is the fastest way to check someone in.
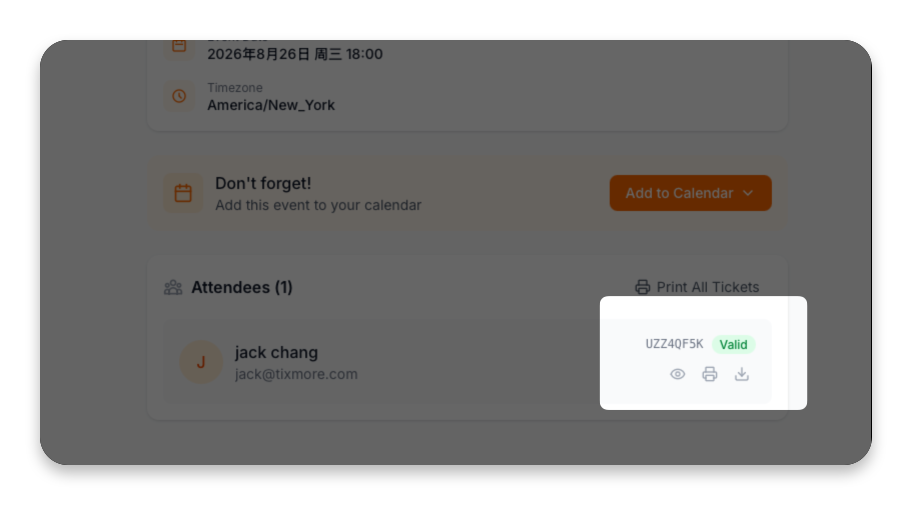
The ticket card on the order page also exposes quick actions for viewing, printing, or downloading the ticket.
3. Check-In at the Door
On event day, your staff can open the organizer console on a phone and tap Check-In from the bottom navigation.
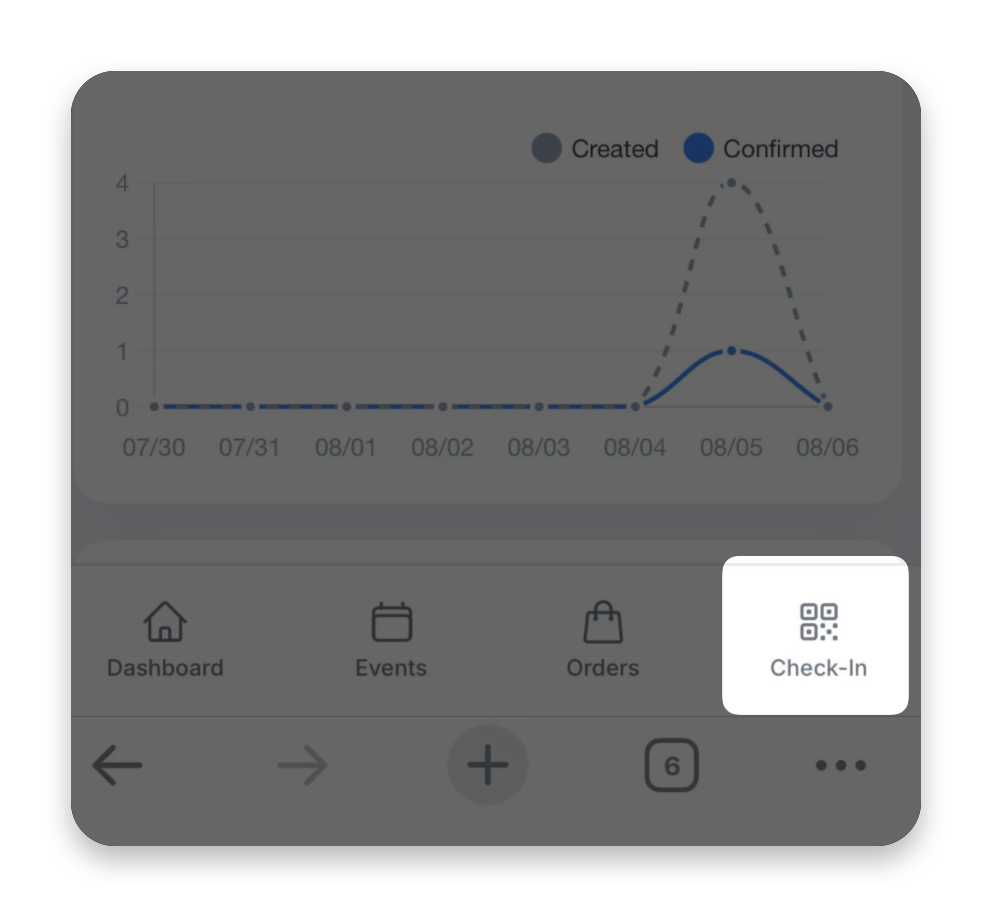
From there, use the device camera to scan the attendee's QR code. When the scan is successful, the system shows a confirmation screen with the attendee name, ticket type, ticket ID, email, order reference, purchase time, and check-in time.
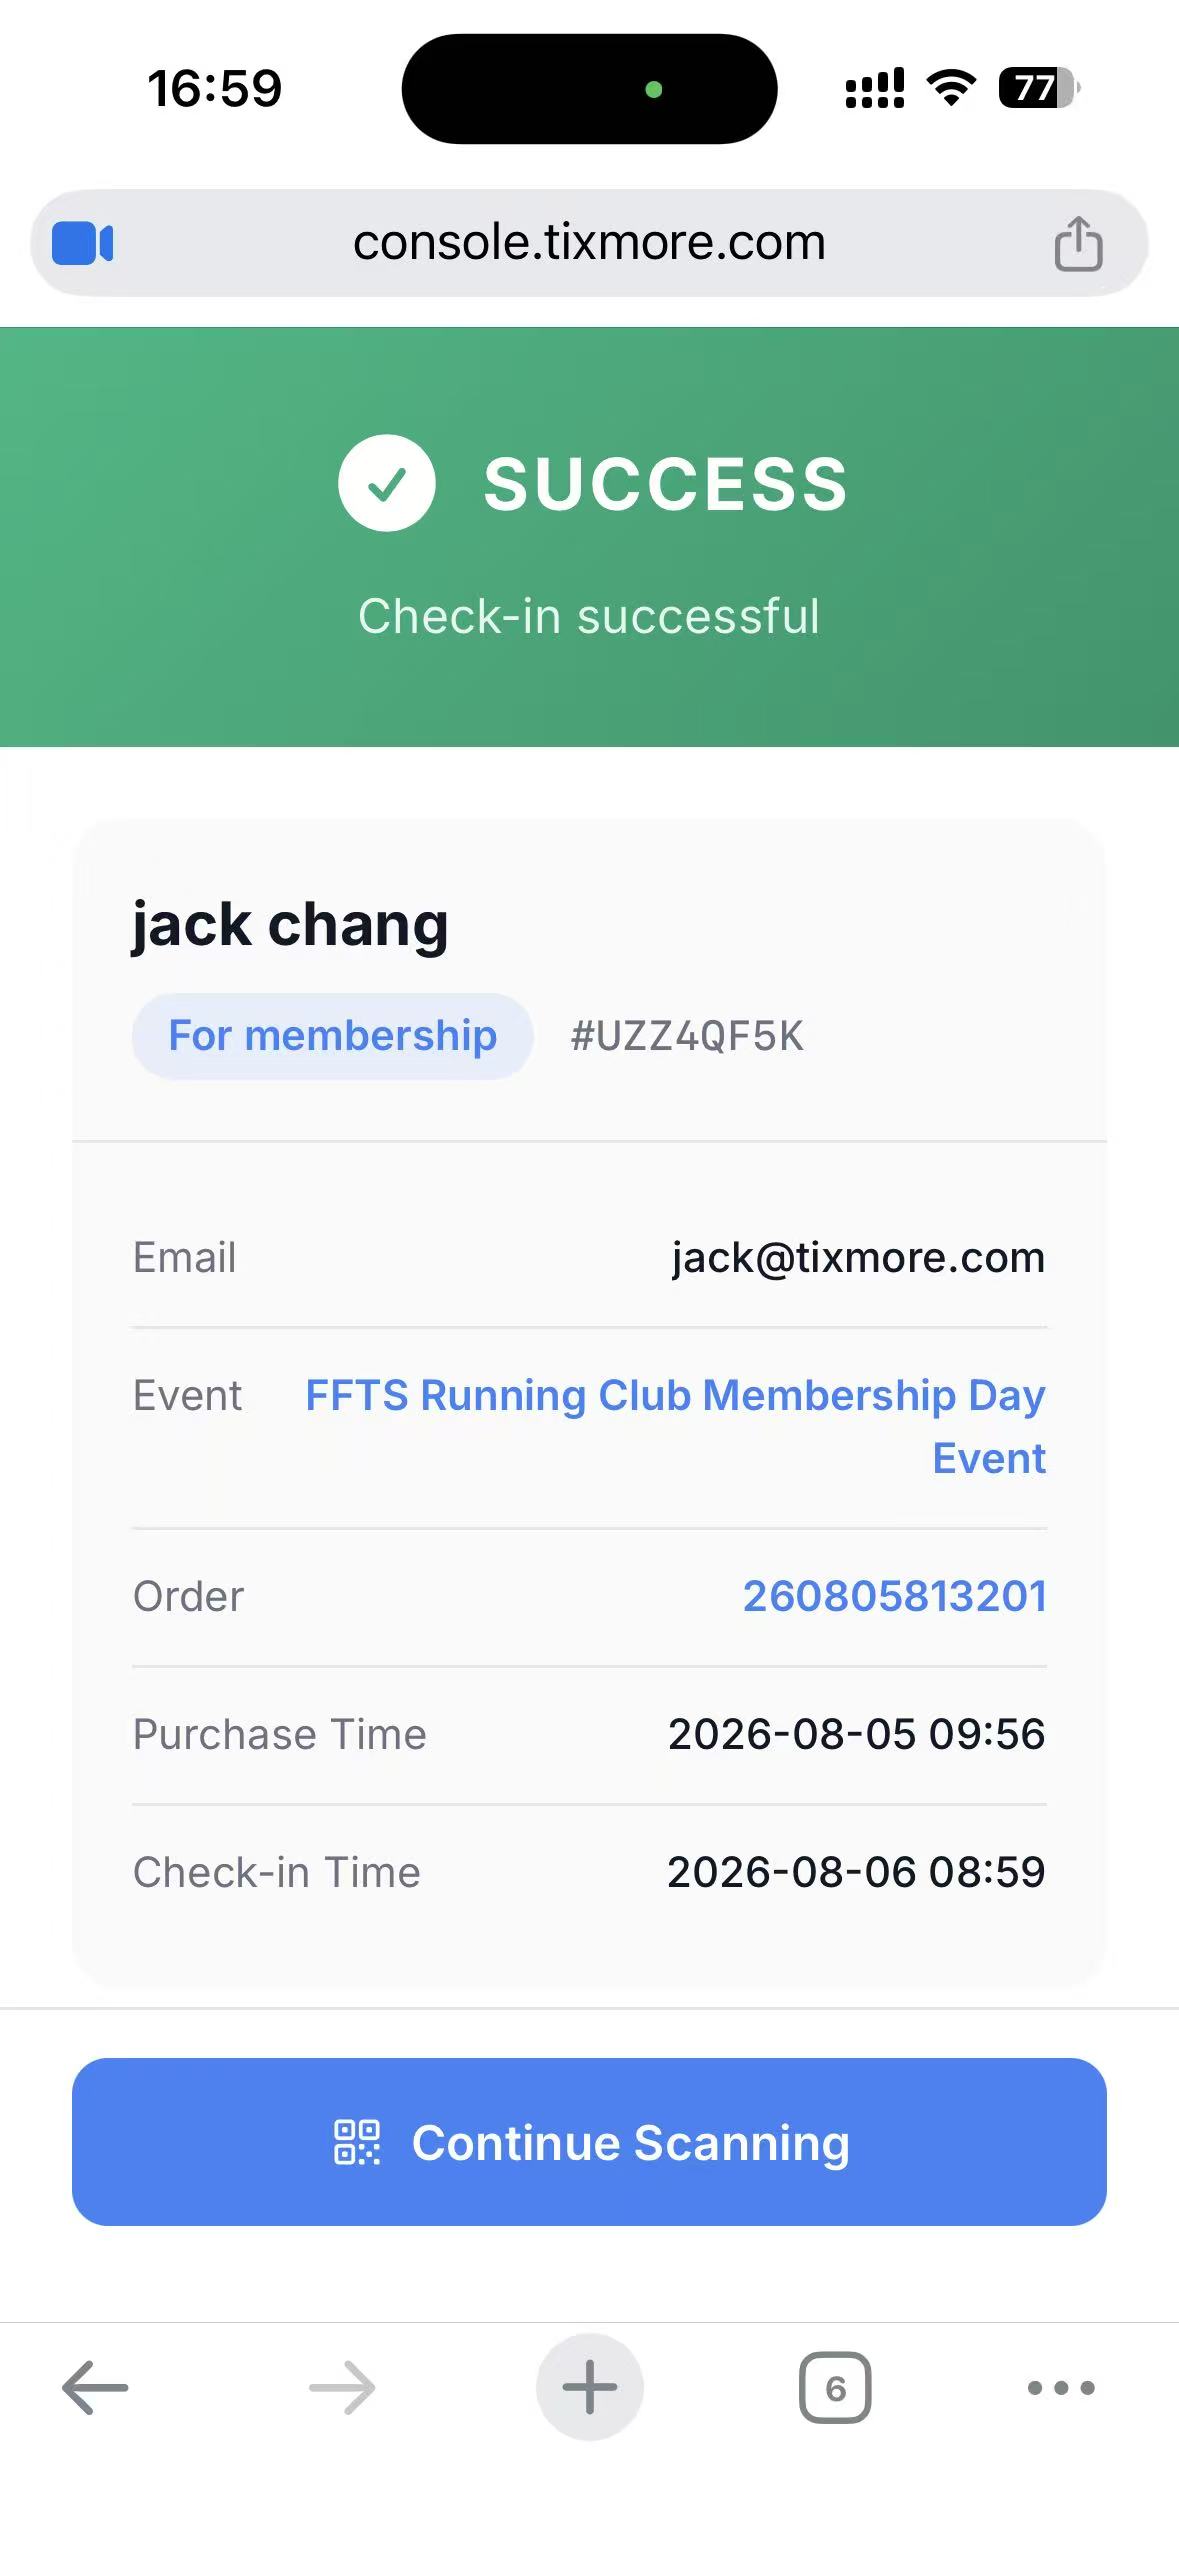
The confirmation view is designed for fast, repeated scanning. After a successful check-in, tap Continue Scanning and move to the next guest.
4. What Your Team Should Expect
- One ticket per attendee: if an order contains multiple attendees, each person gets a separate ticket and QR code.
- Free tickets still need to be checked in: they are not a special case at the door.
- The QR code is the primary entry point: use manual lookup only when a ticket cannot be scanned.
- The order reference helps with support: if a guest cannot find their ticket, the order reference is a useful backup identifier.
If you are running a busy door, keep one device dedicated to scanning and another device available for manual support. That keeps the line moving when someone needs help finding a ticket.
5. Recommended Event-Day Workflow
- Ask the attendee to open the e-ticket on their phone.
- Scan the QR code from the organizer console.
- Confirm the success screen before moving to the next guest.
- Use the order reference or attendee email if a ticket needs to be verified manually.
This setup keeps purchase, delivery, and check-in aligned without needing separate tools at the entrance.