Lineups & Schedules
A great event page doesn't just say when and where — it shows who and what. The Lineup & Schedule feature lets you showcase your guests (speakers, performers, instructors) and lay out a clear agenda so attendees know exactly what they're signing up for.
Where to Find It
In your Event Panel sidebar, go to Advanced → Lineup & Schedule.
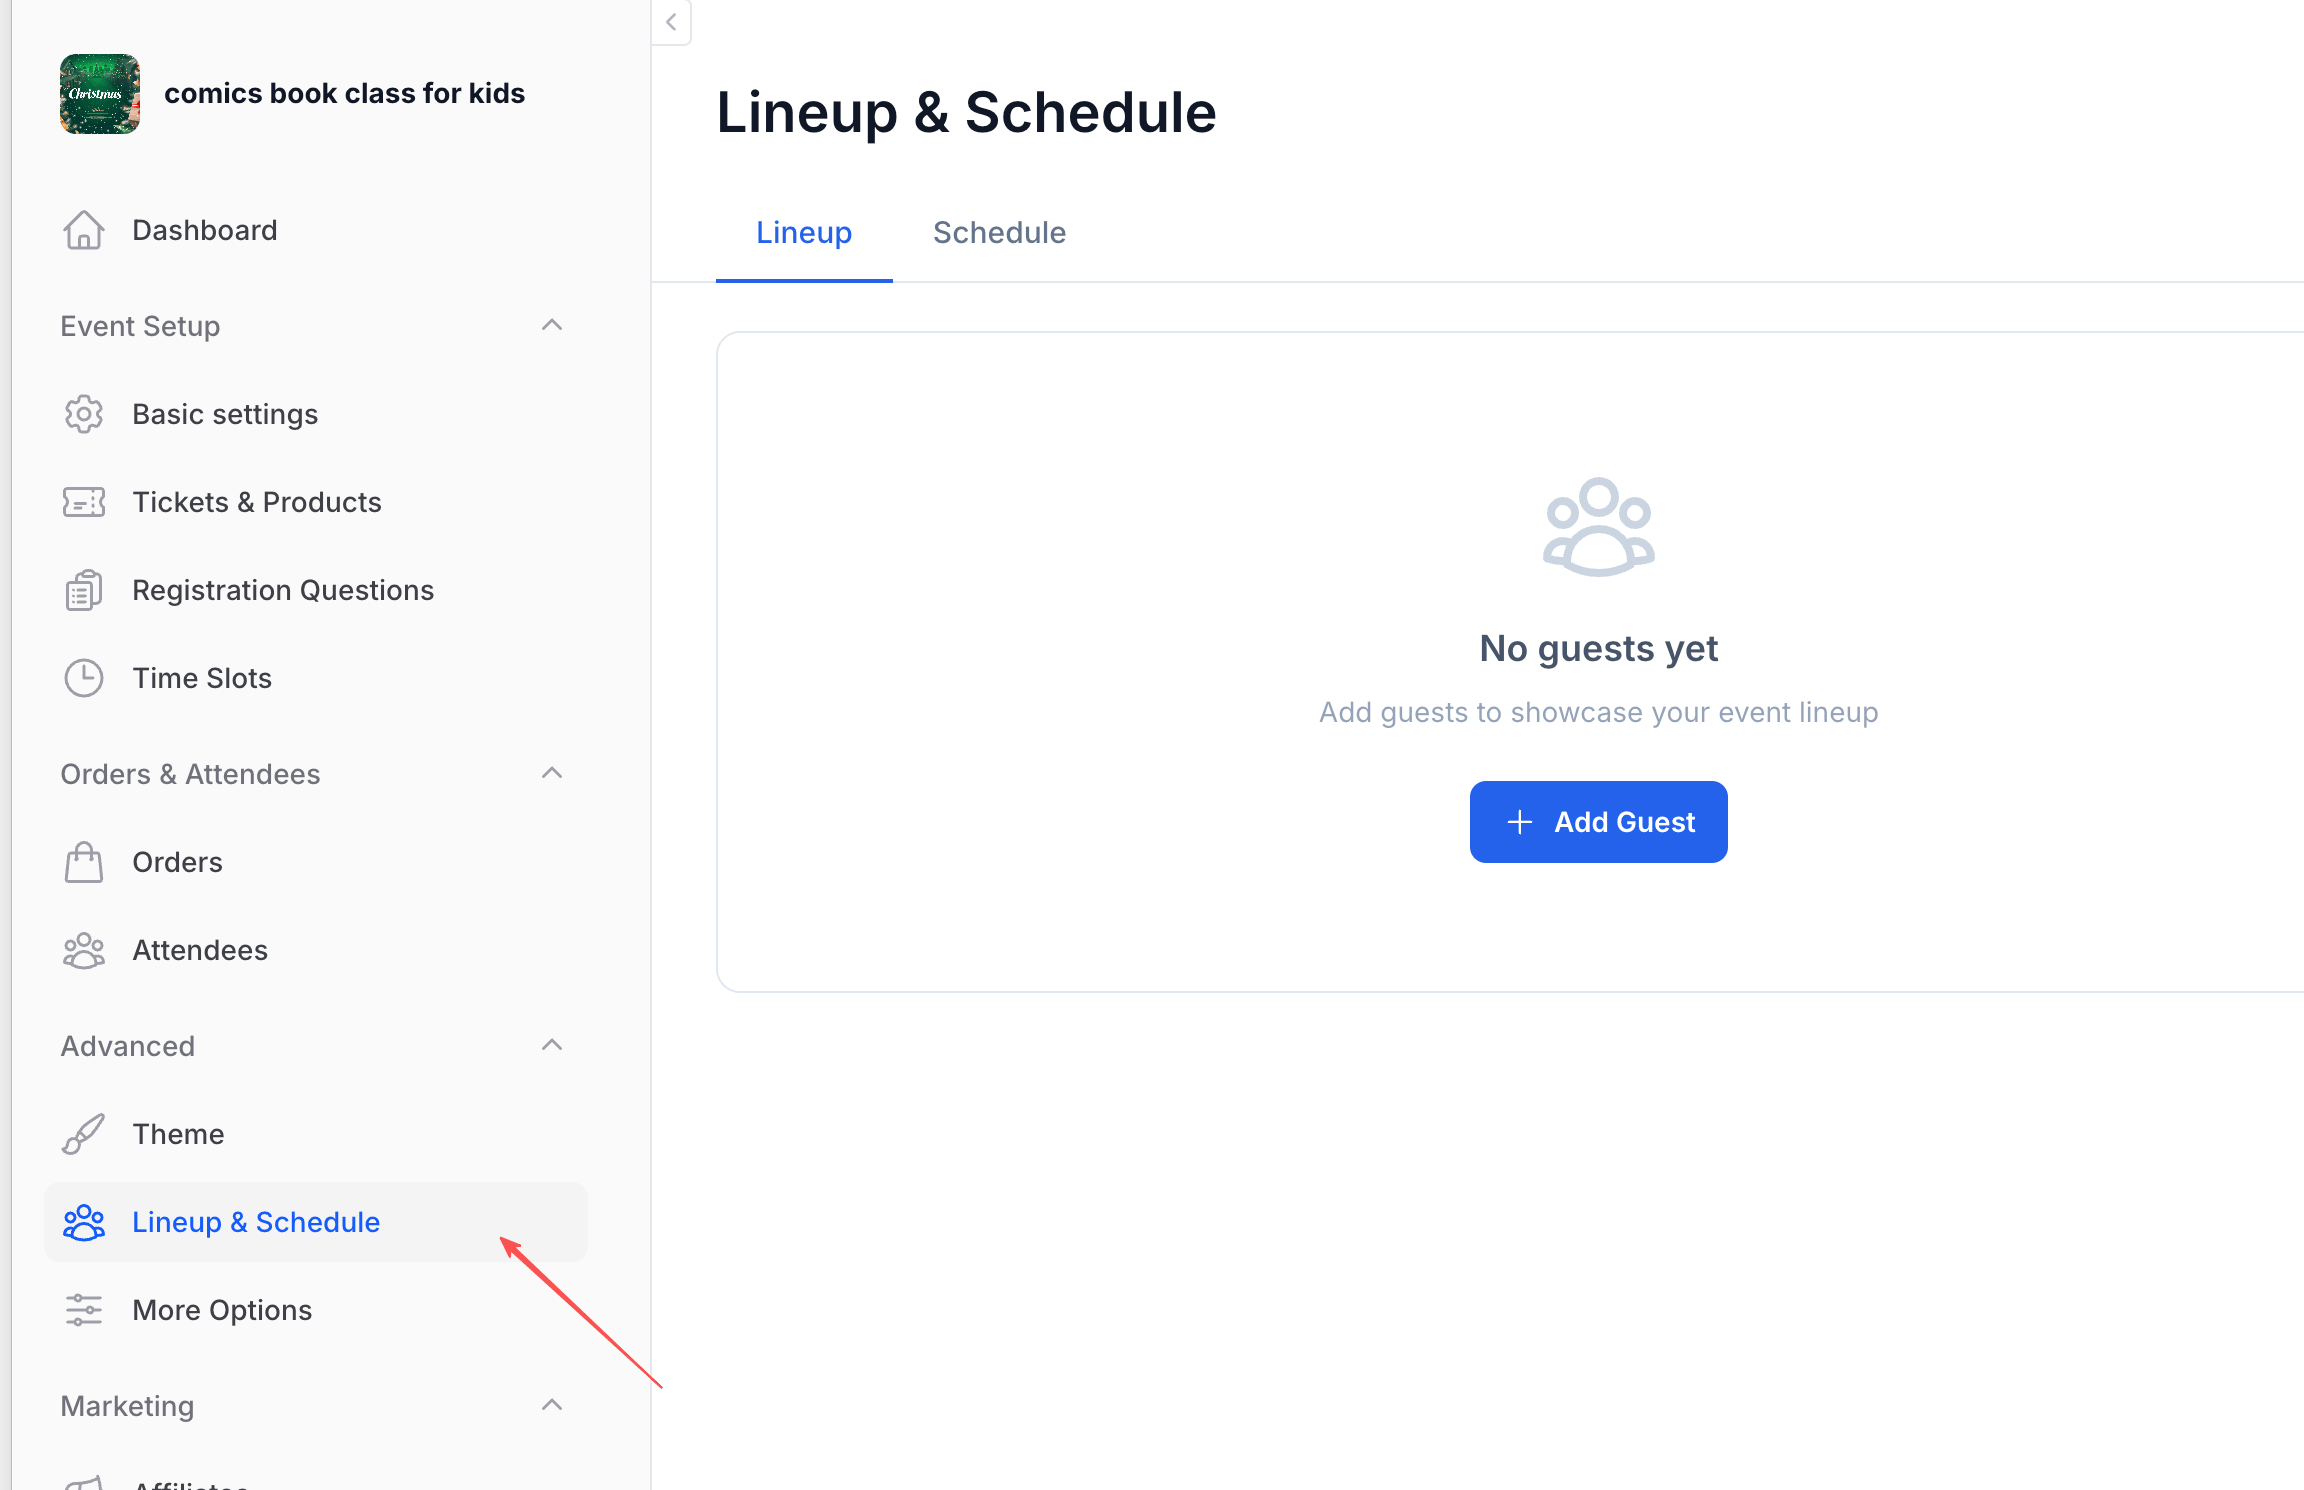
The page has two tabs:
- Lineup — Manage your event's guest list (speakers, performers, hosts)
- Schedule — Build the event agenda with time slots
Lineup — Showcase Your Guests
The Lineup tab is where you add and manage the people who make your event special — keynote speakers, performers, panelists, instructors, or anyone you want to highlight on your event page.
Adding a Guest
Click the "+ Add Guest" button to open the guest form.
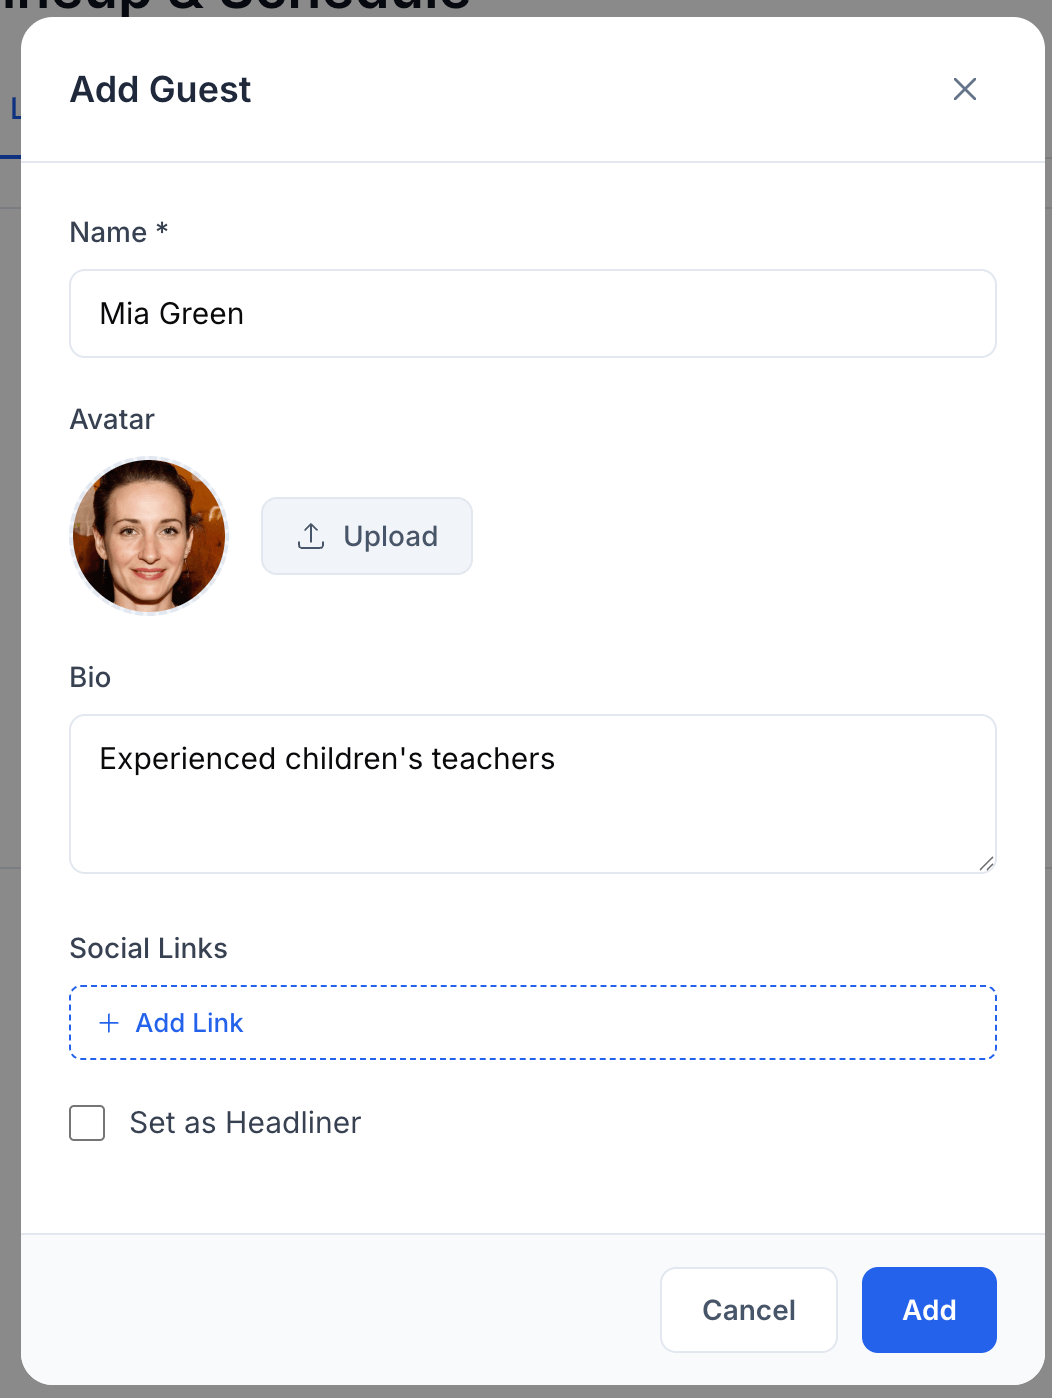
Fill in the following:
| Field | Required | Description |
|---|---|---|
| Name | Yes | The guest's display name — this is what attendees see on the event page |
| Avatar | No | A profile photo. Click "Upload" to add one. Square images work best — they'll be displayed as a circle |
| Bio | No | A short introduction. Keep it to 1–2 sentences — e.g., "Experienced children's teacher" or "Grammy-nominated jazz pianist" |
| Social Links | No | Add links to the guest's social profiles. Click "+ Add Link" and paste a URL — Tixmore automatically detects the platform (Instagram, X/Twitter, YouTube, etc.) |
| Set as Headliner | No | Check this to mark the guest as a headliner. Headliners may be displayed more prominently on your event page |
Click "Add" when you're done.
Reusing Guests Across Events
When you start typing a name, Tixmore searches your existing guest database — guests you've previously created under your organizer account. This means you only need to set up a guest's profile once. For future events, just search and add them without re-entering their details.
Managing Your Lineup
Once guests are added, you can:
- Reorder — Drag the handle (☰) on the left side of each guest card to rearrange the display order
- Edit — Click the edit icon to update a guest's name, avatar, bio, or social links
- Remove — Click the remove icon to detach a guest from this event (this doesn't delete the guest from your account — they'll still be available for other events)
- Toggle Headliner — Change headliner status at any time
Think of your guests as a reusable library. If you run recurring events with the same speakers or performers, you only need to create their profiles once. Just search and add them to each new event.
Schedule — Build Your Agenda
The Schedule tab lets you create a timeline of activities for your event. Switch to the Schedule tab to get started.
Adding a Schedule Item
Click the "+ Add Schedule" button to open the schedule form.
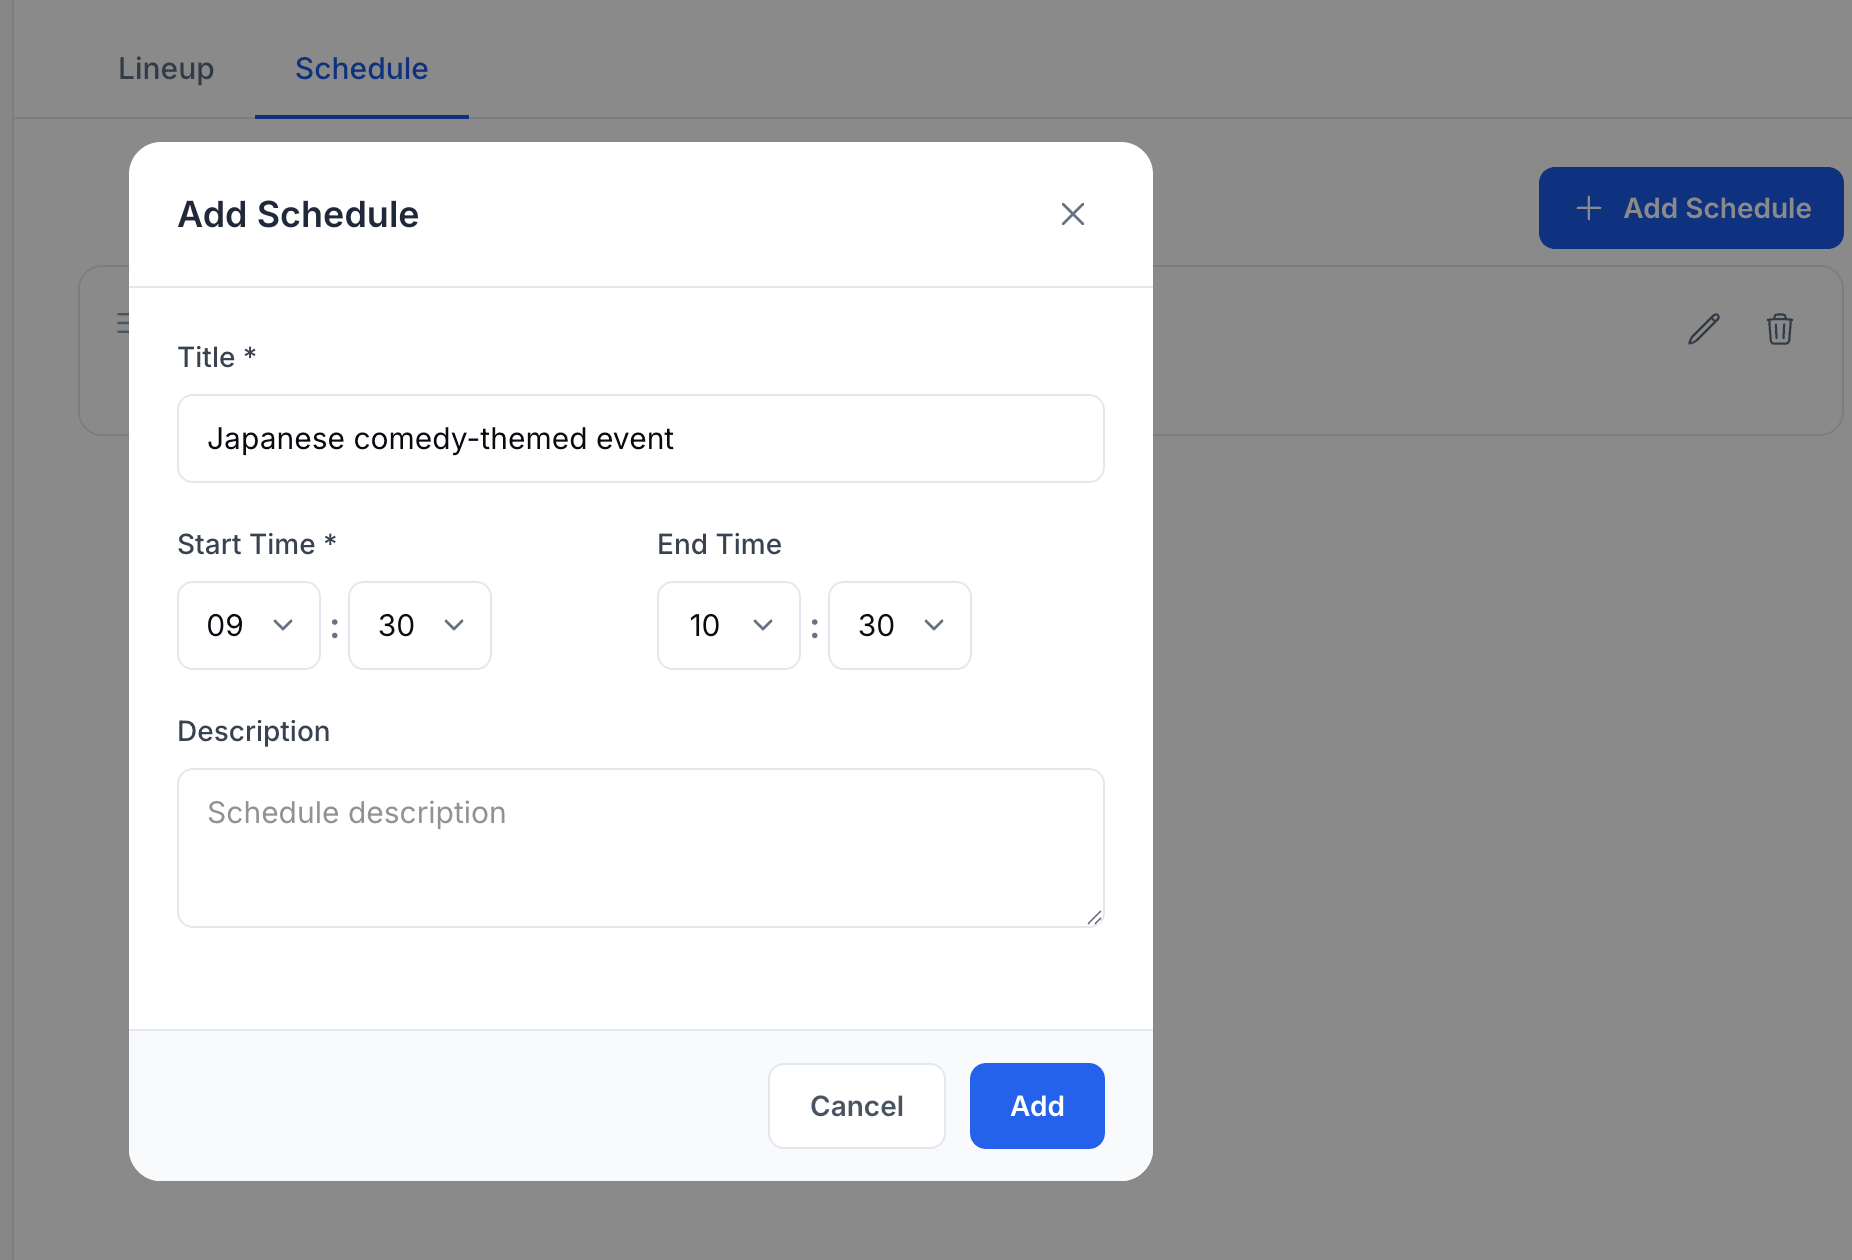
Fill in the following:
| Field | Required | Description |
|---|---|---|
| Title | Yes | What's happening — e.g., "Check-in", "Keynote Speech", "Lunch Break" |
| Start Time | Yes | When this item begins. Select hours and minutes from the dropdown |
| End Time | No | When it ends. Leave blank for open-ended items (like a lunch break with no fixed end) |
| Description | No | Additional details — speaker name, room number, or any notes attendees should know |
Click "Add" to save.
Managing Your Schedule
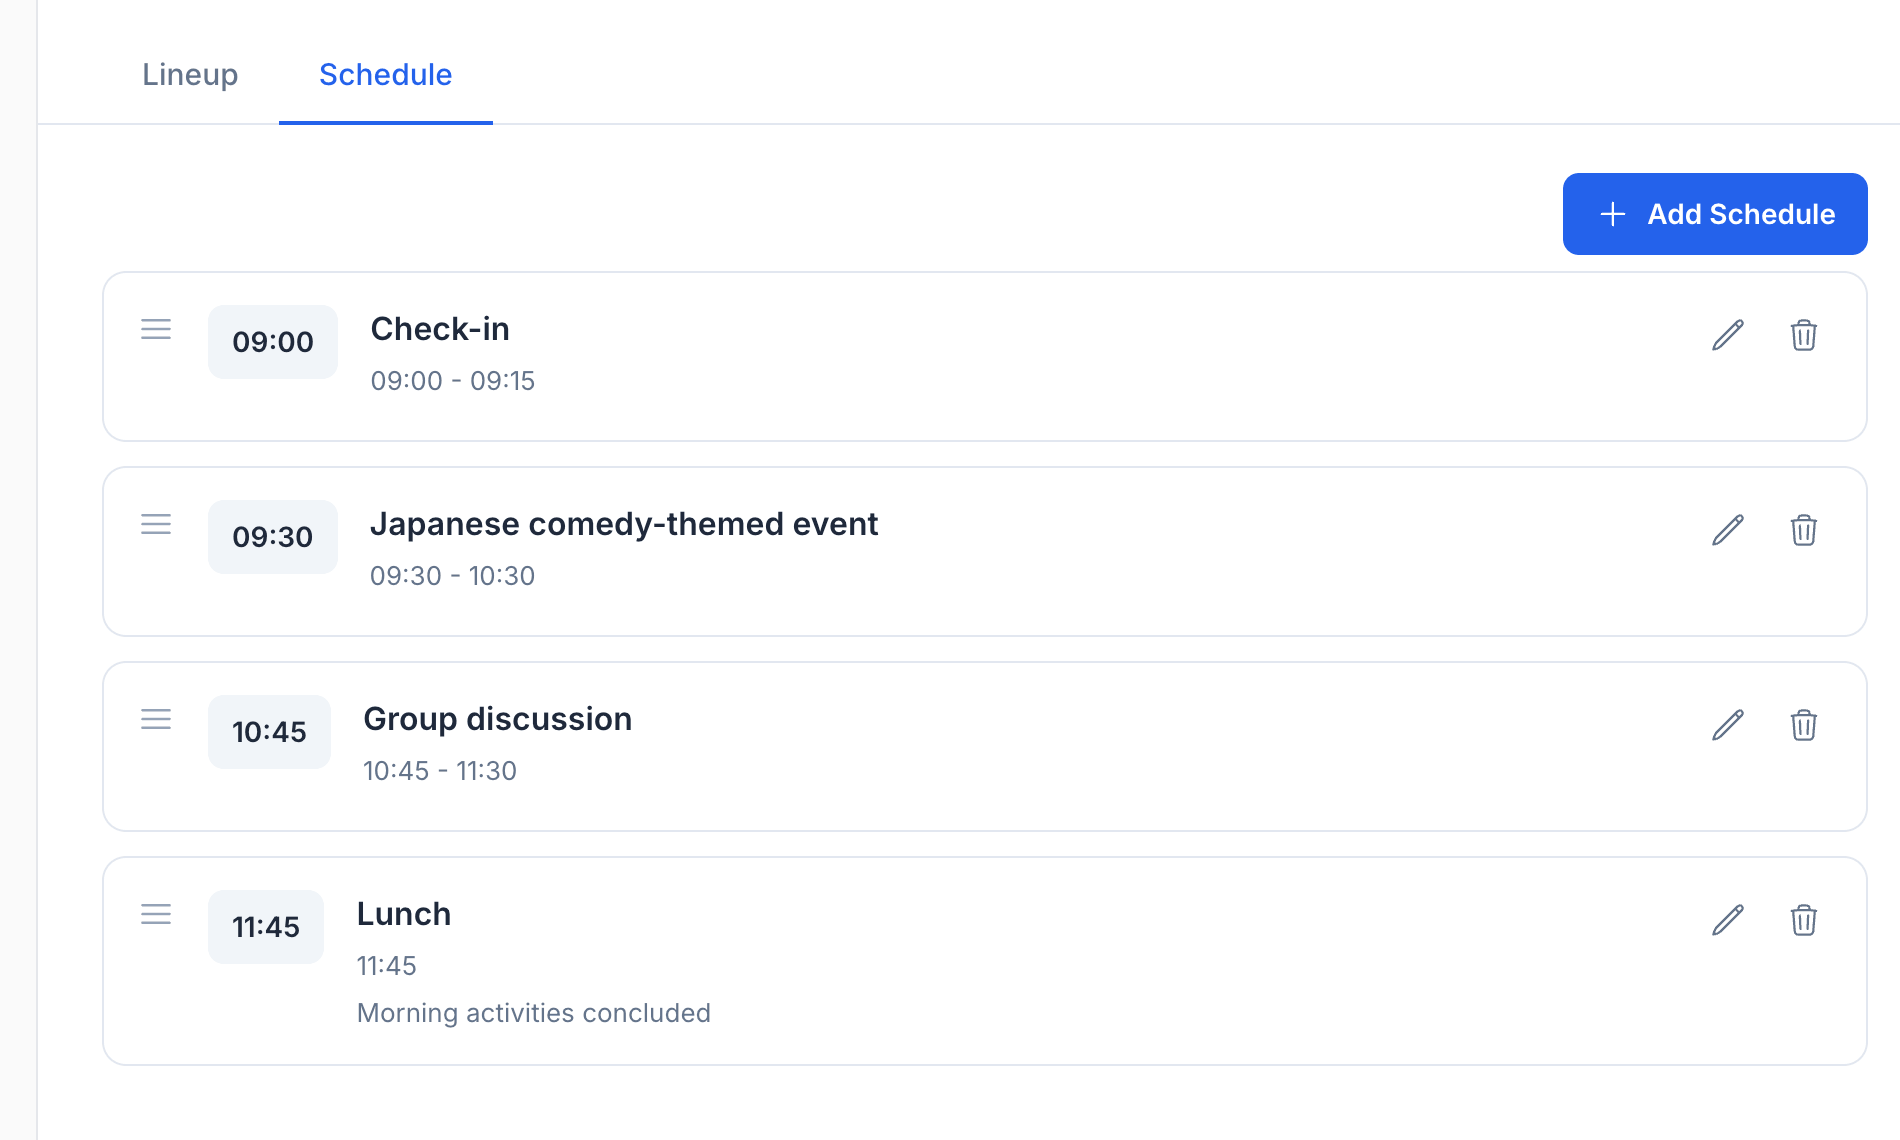
Each schedule item shows as a card with the start time prominently displayed. You can:
- Reorder — Drag the handle (☰) to rearrange items. The display order is independent of time — you control how items appear
- Edit — Click the pencil icon to update any field
- Delete — Click the trash icon to remove an item
Tips for a Good Schedule
Be specific with titles. "Panel: The Future of AI in Education" is better than "Panel Discussion". Attendees scan the schedule to decide if the event is worth their time.
Include transitions. Add items like "Check-in", "Networking Break", or "Lunch" so attendees can plan their day. Not every item needs to be a session.
Use descriptions sparingly. A one-line note is enough — e.g., "Morning activities concluded". Don't write paragraphs.
Mind the time gaps. If your keynote ends at 10:30 and the next panel starts at 10:45, that 15-minute gap is obvious to attendees. Either add a "Break" item or adjust the times.
How It Looks on the Event Page
Both the lineup and schedule appear on your public event page, below the event description.
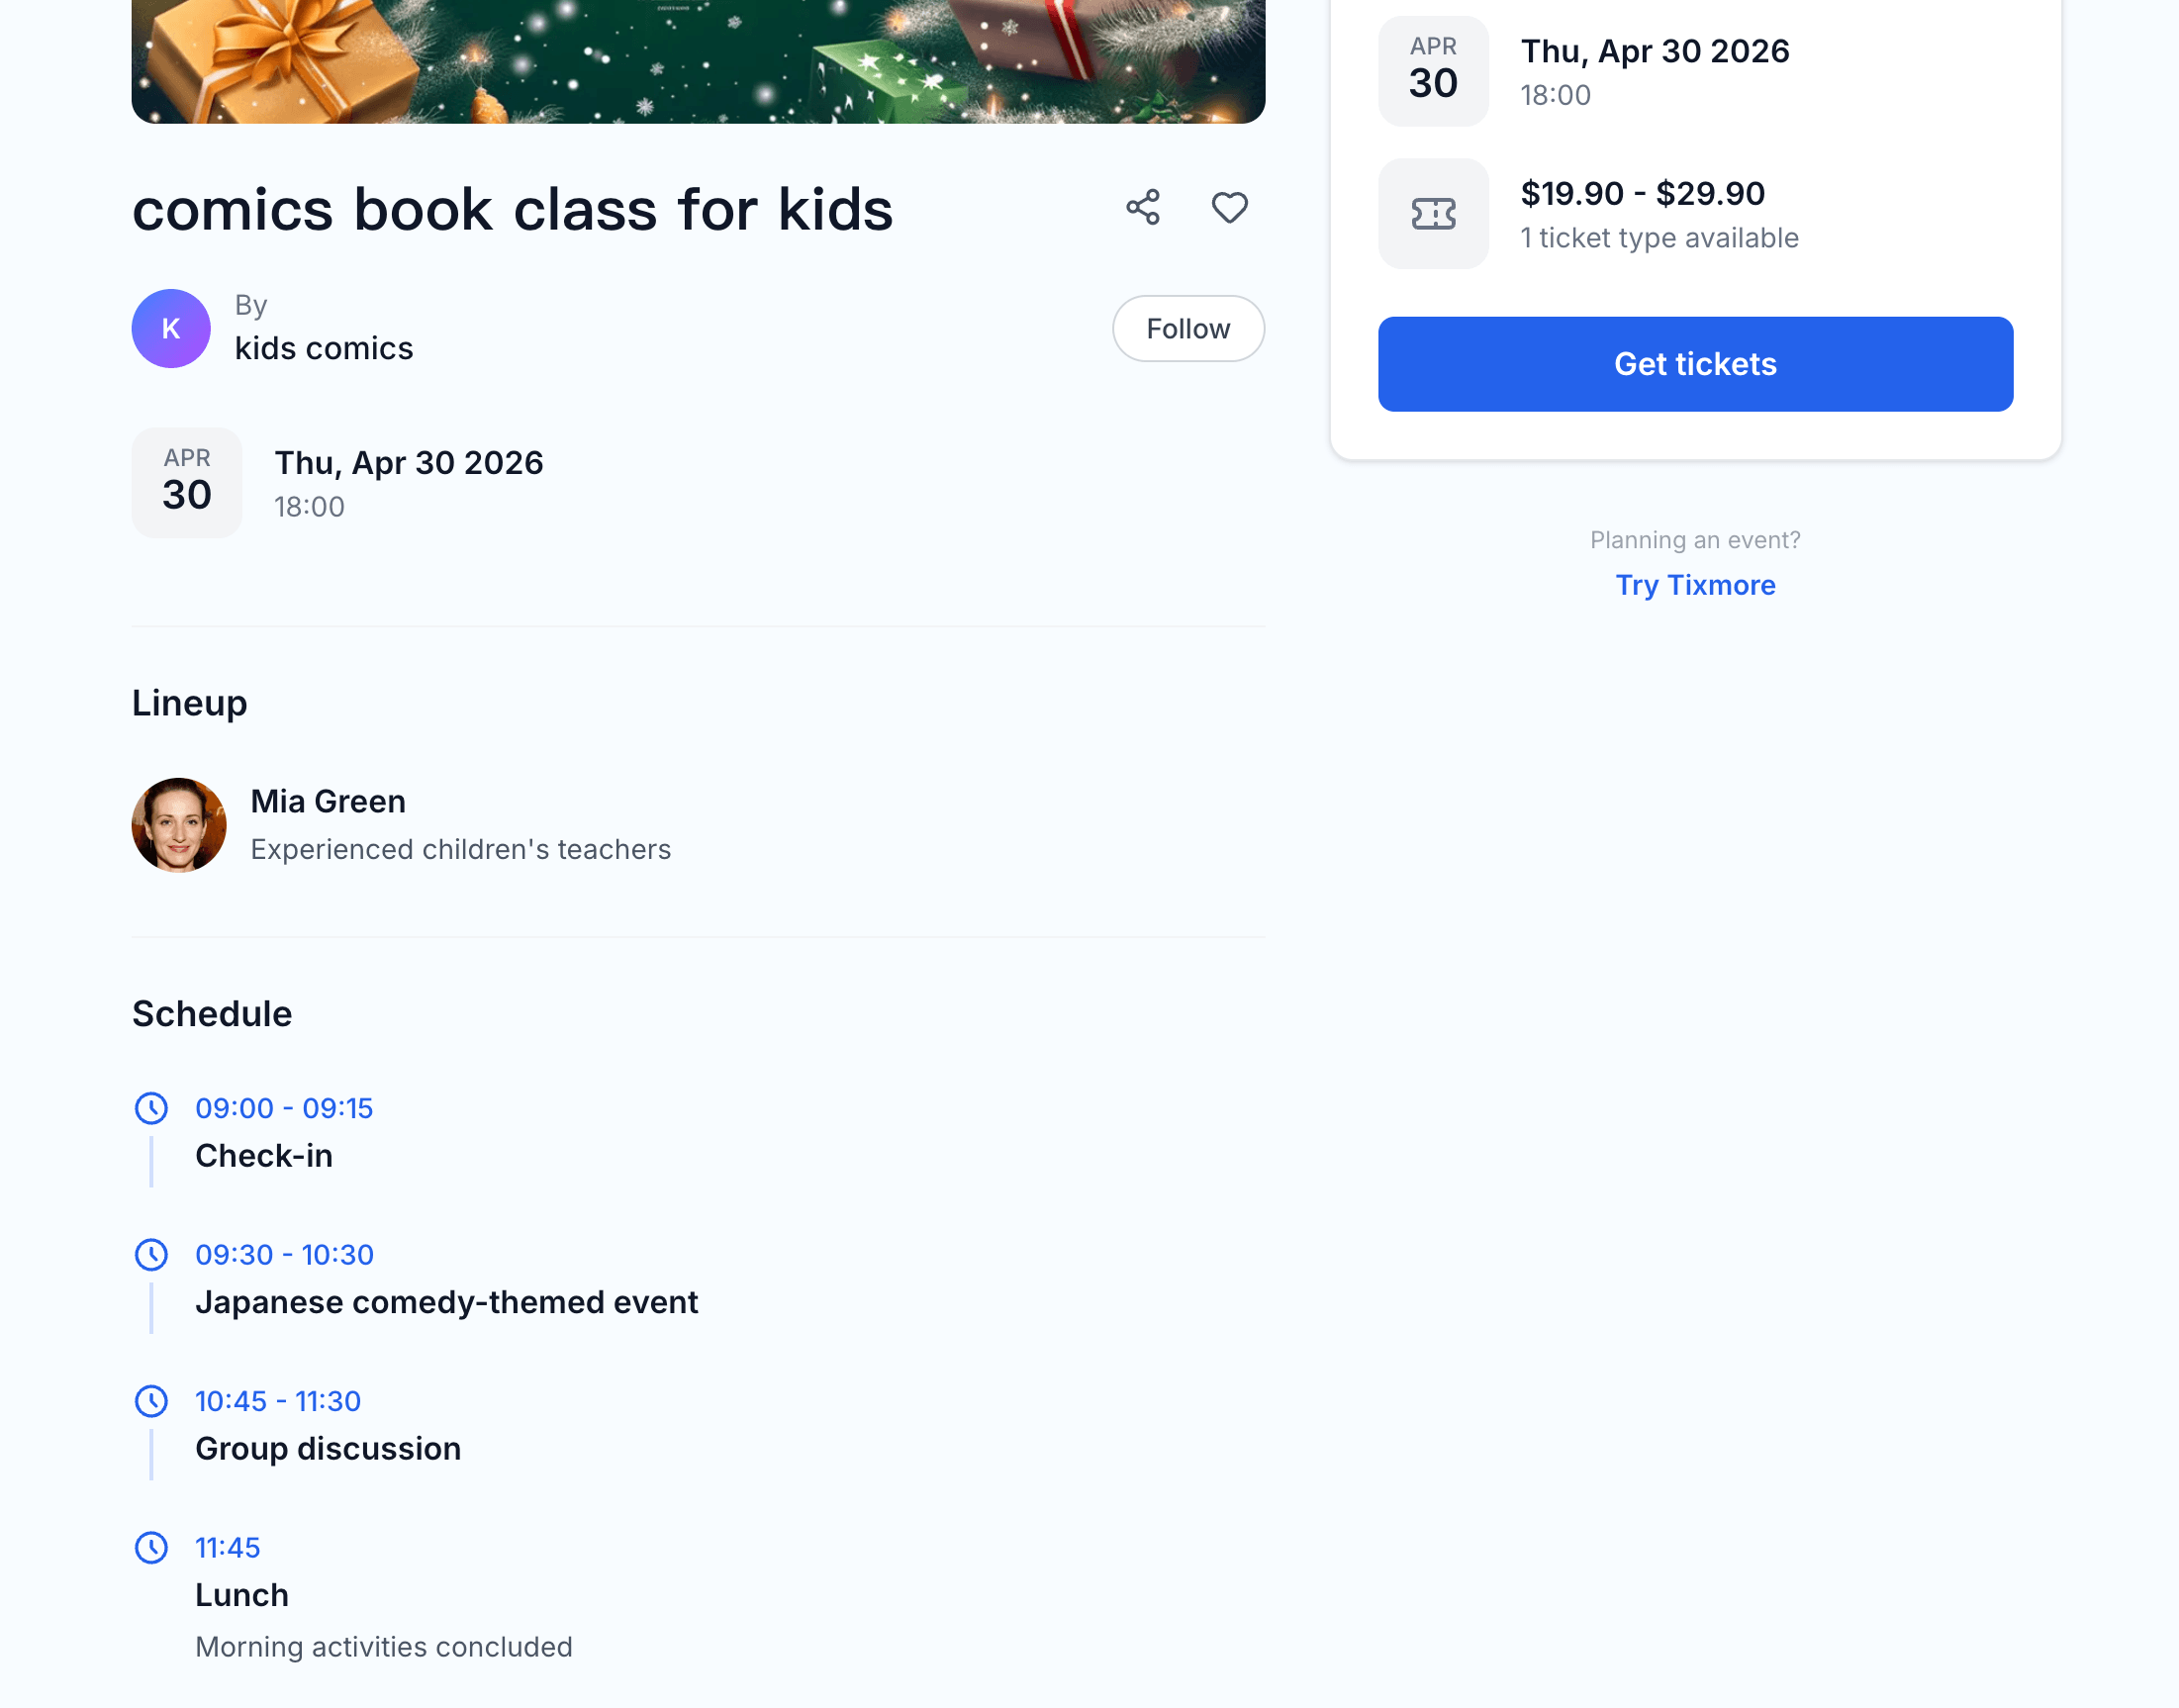
- Lineup shows guest names with their avatars and bios
- Schedule shows each item as a timeline with start/end times and descriptions
This gives attendees a complete picture of what to expect — who's presenting and when things are happening.
The lineup and schedule sections only appear on the event page when you've added at least one guest or schedule item. If both are empty, the sections are hidden.
Quick Reference
| Action | How to |
|---|---|
| Add a guest | Lineup tab → + Add Guest → fill form → Add |
| Reuse an existing guest | Start typing the name → select from suggestions |
| Mark as headliner | Check "Set as Headliner" when adding or editing |
| Add a schedule item | Schedule tab → + Add Schedule → fill form → Add |
| Reorder items | Drag the ☰ handle on any card |
| Edit or delete | Use the pencil or trash icons on each card |
Looking to customize the overall look of your event page? Check out the Event Page & Theme guide.