Connect Stripe to Get Paid
This is the one step you cannot skip if you're selling paid tickets. Tixmore uses Stripe to process card payments and send your money to your bank. Until you connect a Stripe account, your event can be published — but it cannot take a single payment.
The good news: connecting takes just a few minutes, it's free, and Stripe handles all the heavy lifting (card processing, security, and compliance).
You must connect Stripe before you can receive any money from ticket sales. If your event is completely free, you can skip this — but the moment you add a paid ticket, a connected Stripe account is required.
Why Stripe?
Stripe is one of the most trusted payment processors in the world, used by millions of businesses. Here's what it means for you as an organizer:
- The money is yours, directly. Payments land in your own Stripe account, not in a Tixmore wallet. We never hold your funds.
- Tixmore is an official Stripe partner. You'll see this confirmed on Stripe's own page during setup (more on that below). The connection is the standard, secure Stripe Connect flow.
- Security is handled for you. Stripe is PCI-compliant and manages all sensitive card and bank data. Tixmore never sees or stores your bank or card details.
- You get your own dashboard. Track your balance, payout schedule, and bank details anytime in your Stripe Express dashboard.
Step 1 — Open Payment Settings
Where: Settings → Payment
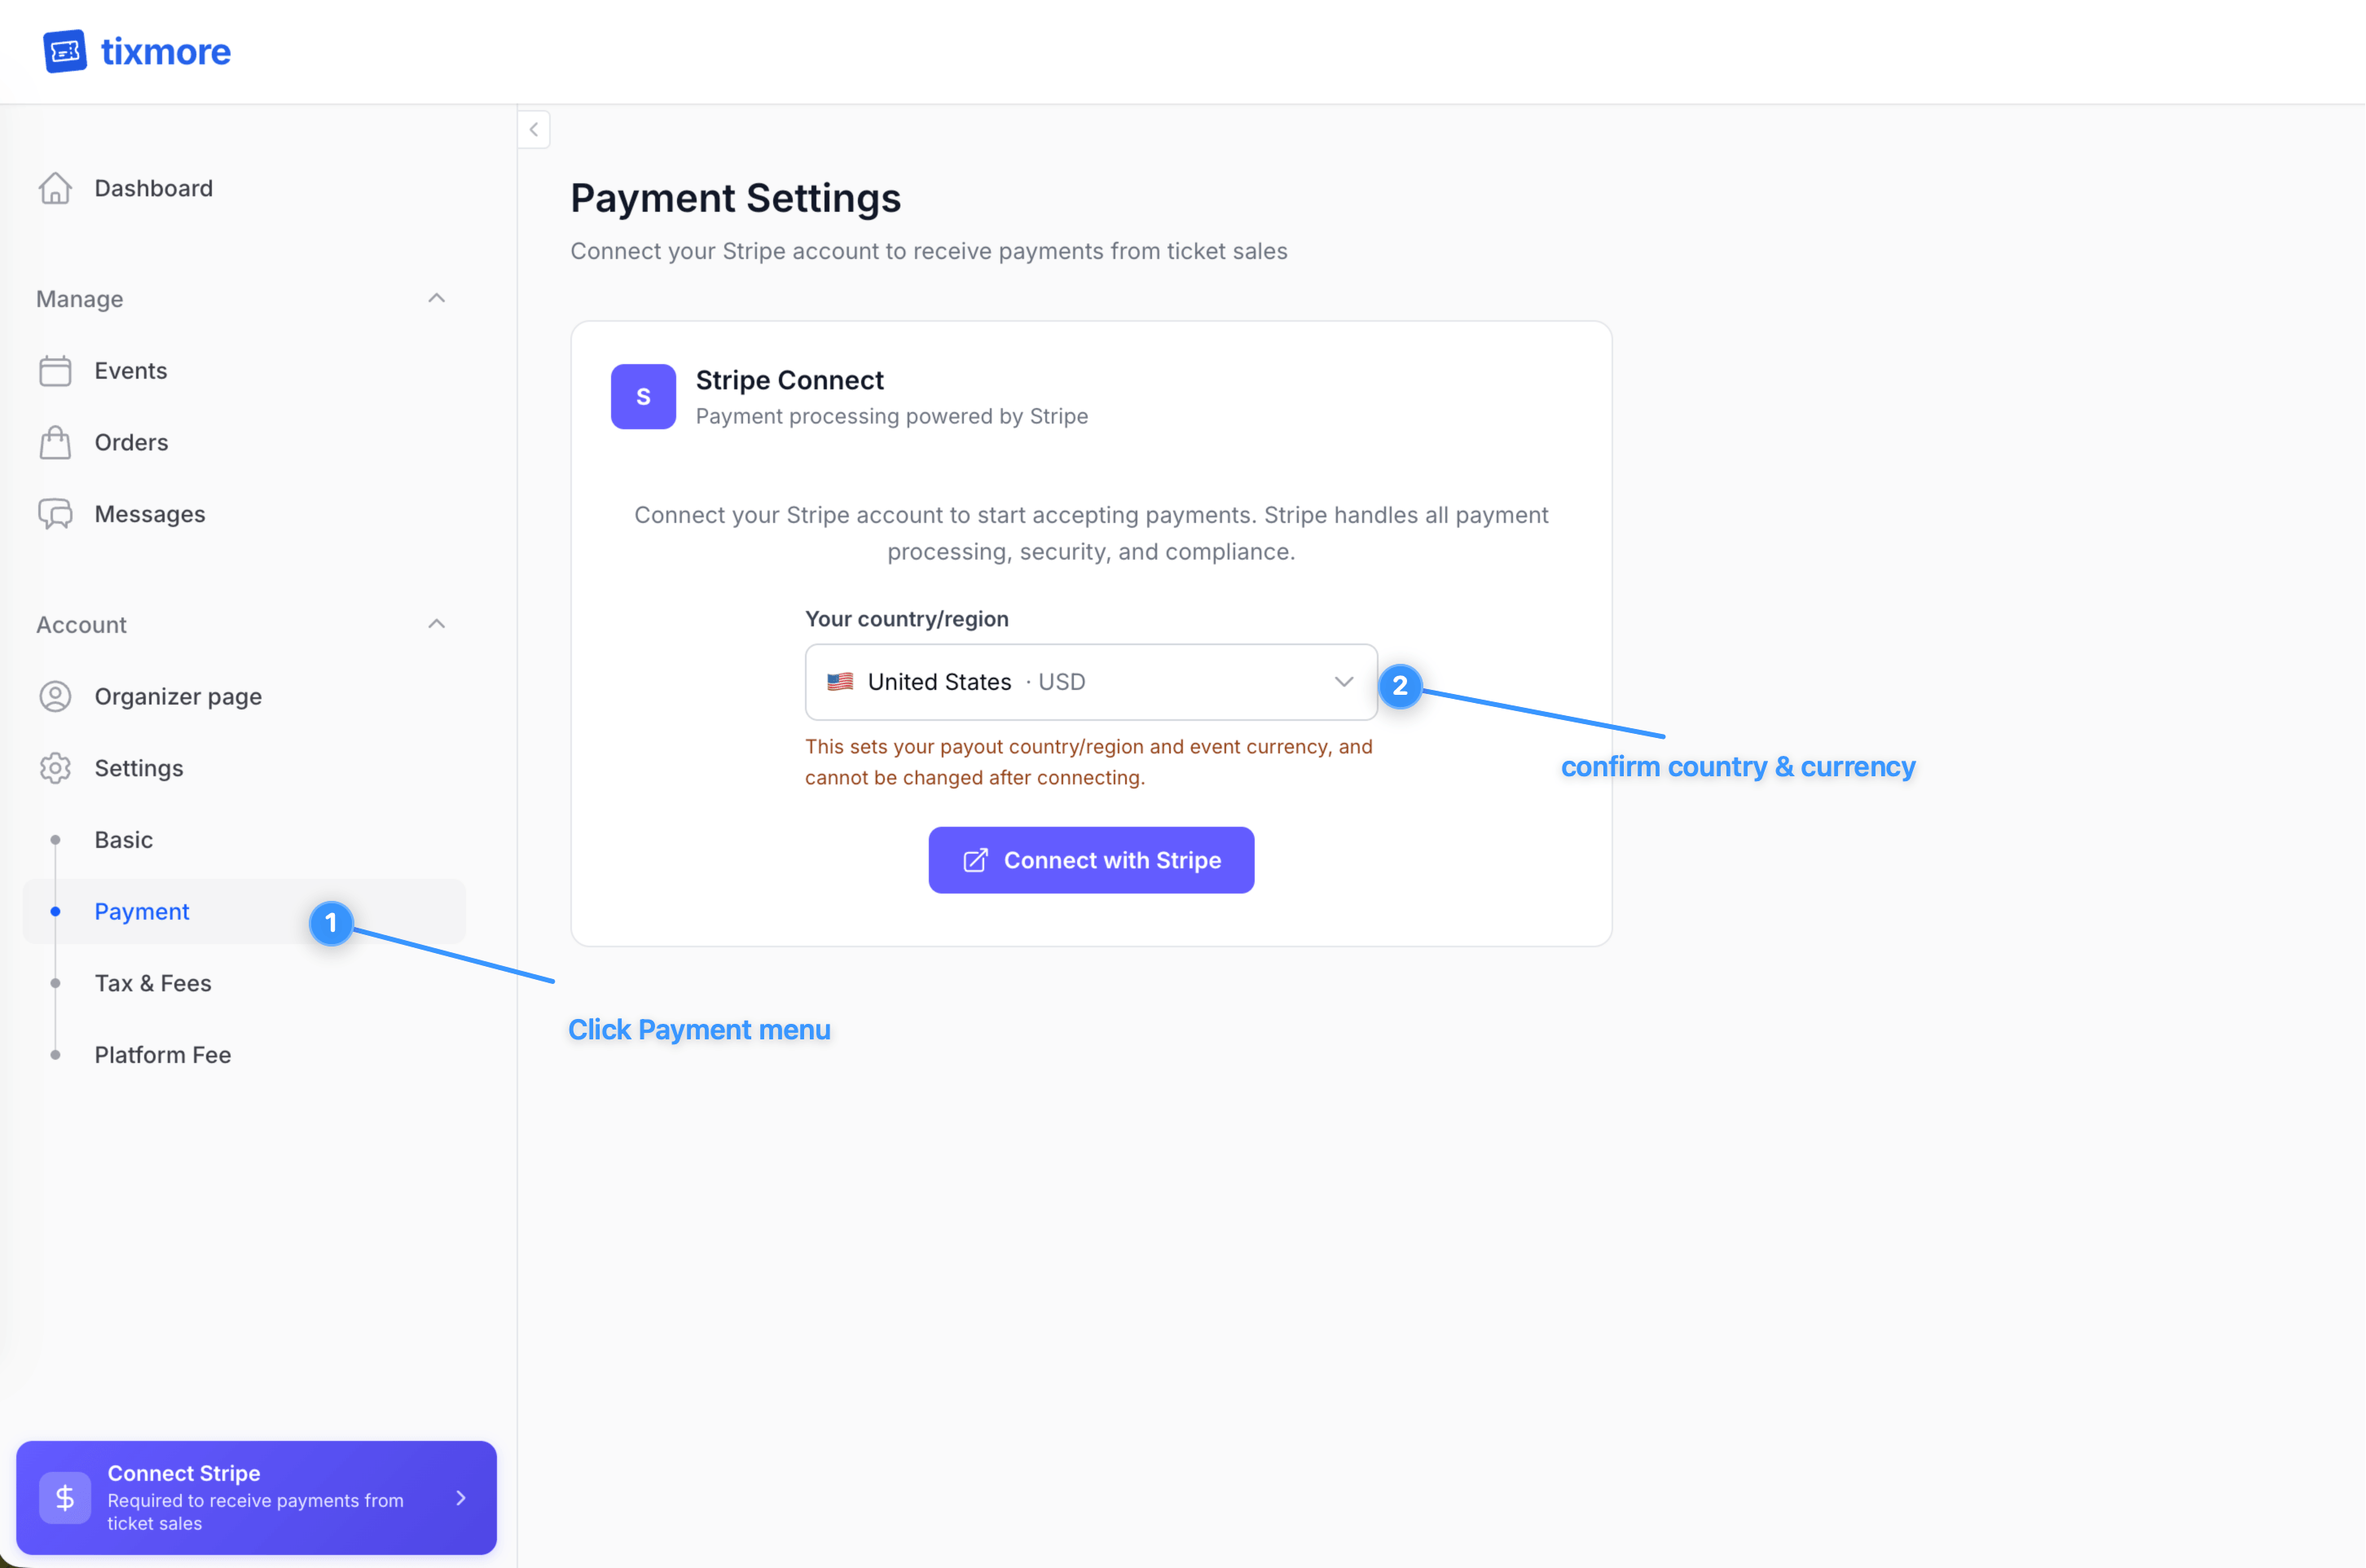
In your organizer dashboard, open the Account section in the left menu, click Settings, then Payment. You'll land on the Stripe Connect card. (You'll also notice a "Connect Stripe — Required to receive payments" reminder pinned at the bottom-left until you're set up.)
Before you click connect:
- Choose your country/region. This is the country where your business or bank account is based. The picker is searchable — just start typing.
- Confirm the currency. Each country/region has a fixed settlement currency (e.g. United States → USD). This is the currency your events will be priced and paid out in.
Once you connect, your country/region and settlement currency cannot be changed. Double-check both before clicking Connect with Stripe. If you run events in multiple currencies, you'll need a separate organizer account for each.
When you're happy with both, click Connect with Stripe.
Step 2 — Sign in or create your Stripe account
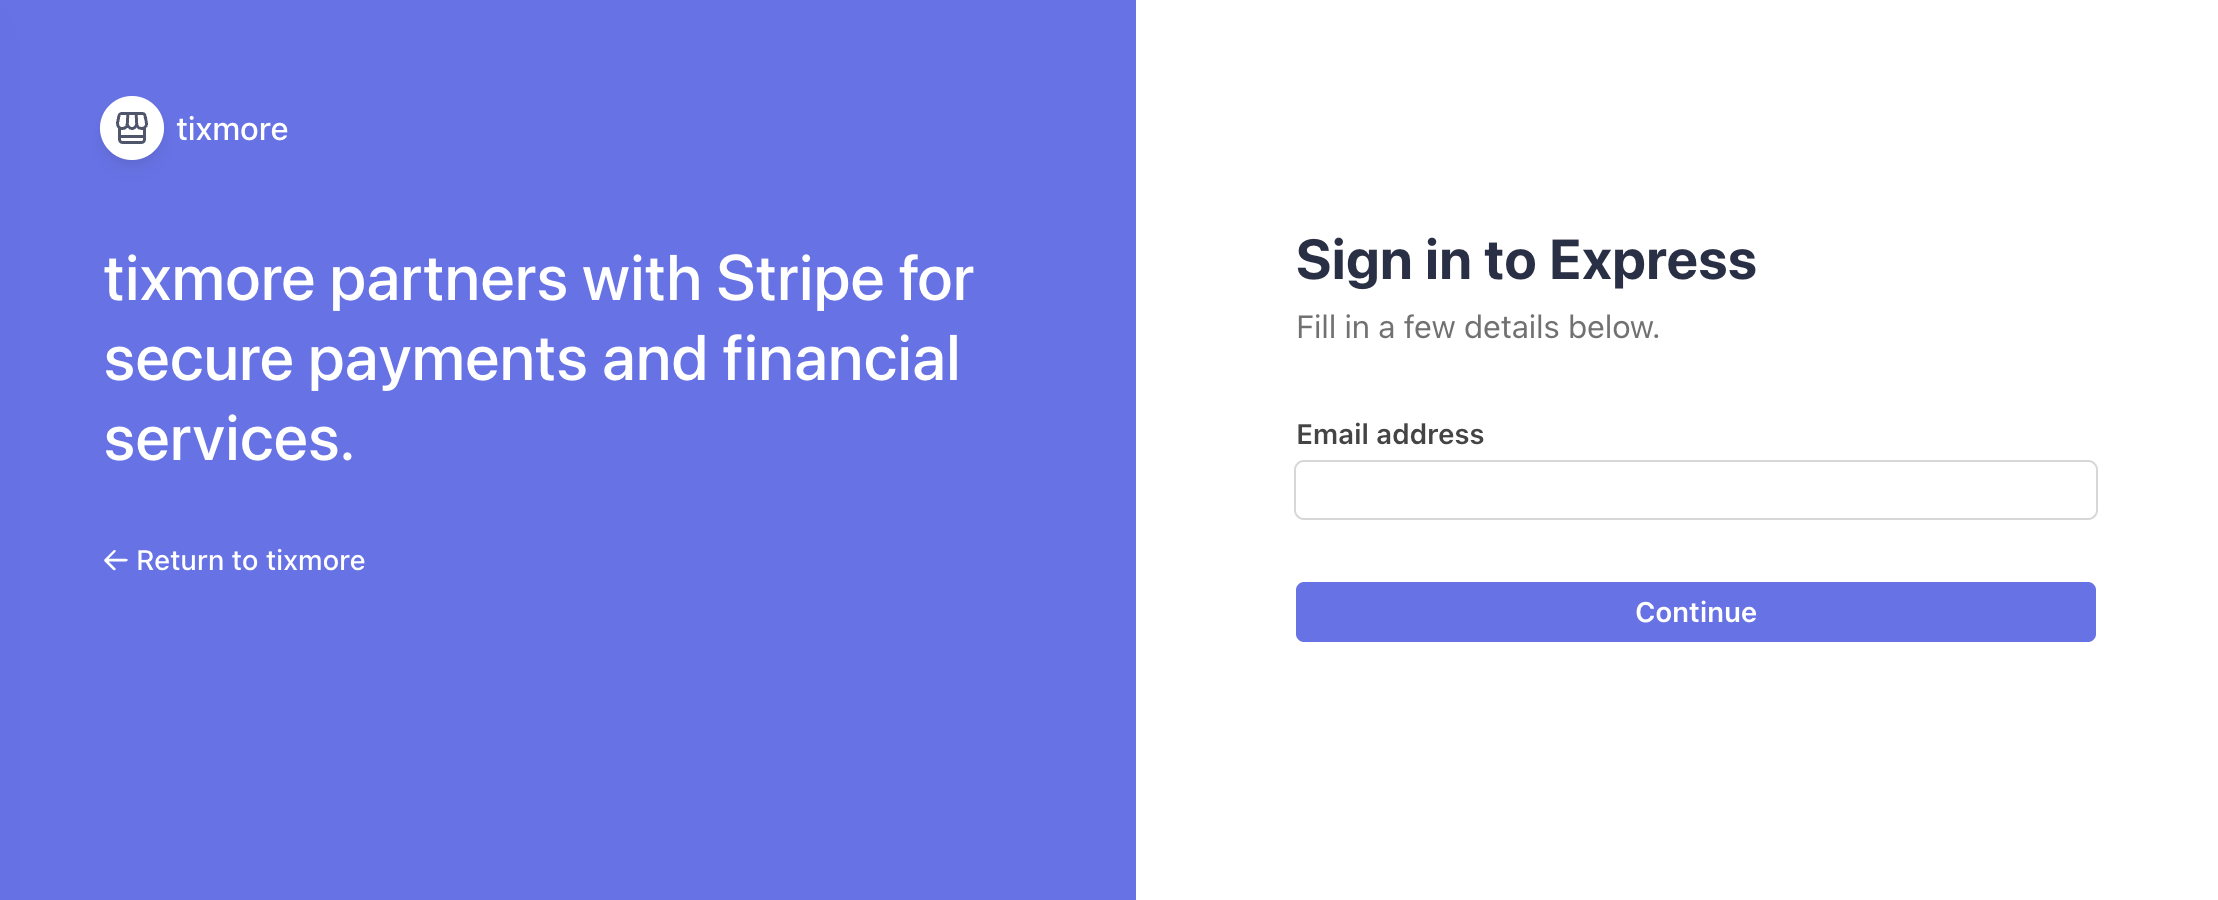
Clicking connect takes you to Stripe's own secure page. Notice the left side of the screen: it clearly reads "tixmore partners with Stripe for secure payments and financial services." — that's your confirmation that you're in the official, secure tixmore ↔ Stripe flow.
Already have a Stripe account?
Just enter your email address and click Continue — Stripe will sign you in and link your existing account.
New to Stripe? No problem — it's quick
You don't need a Stripe account beforehand. Enter your email and Stripe will guide you through creating one on the spot. You'll be asked for a few standard details:
- Basic business or personal information
- A photo ID for identity verification (passport or driver's license)
- A bank account or debit card where you'd like your payouts sent
Setup goes fastest if you have your ID and bank account details ready. The whole process usually takes under 5–10 minutes.
Verifying your identity (known as "KYC") is a legal requirement for handling payments. It protects you, your buyers, and keeps payouts flowing without holds. This is standard for every payment processor.
Step 3 — You're connected
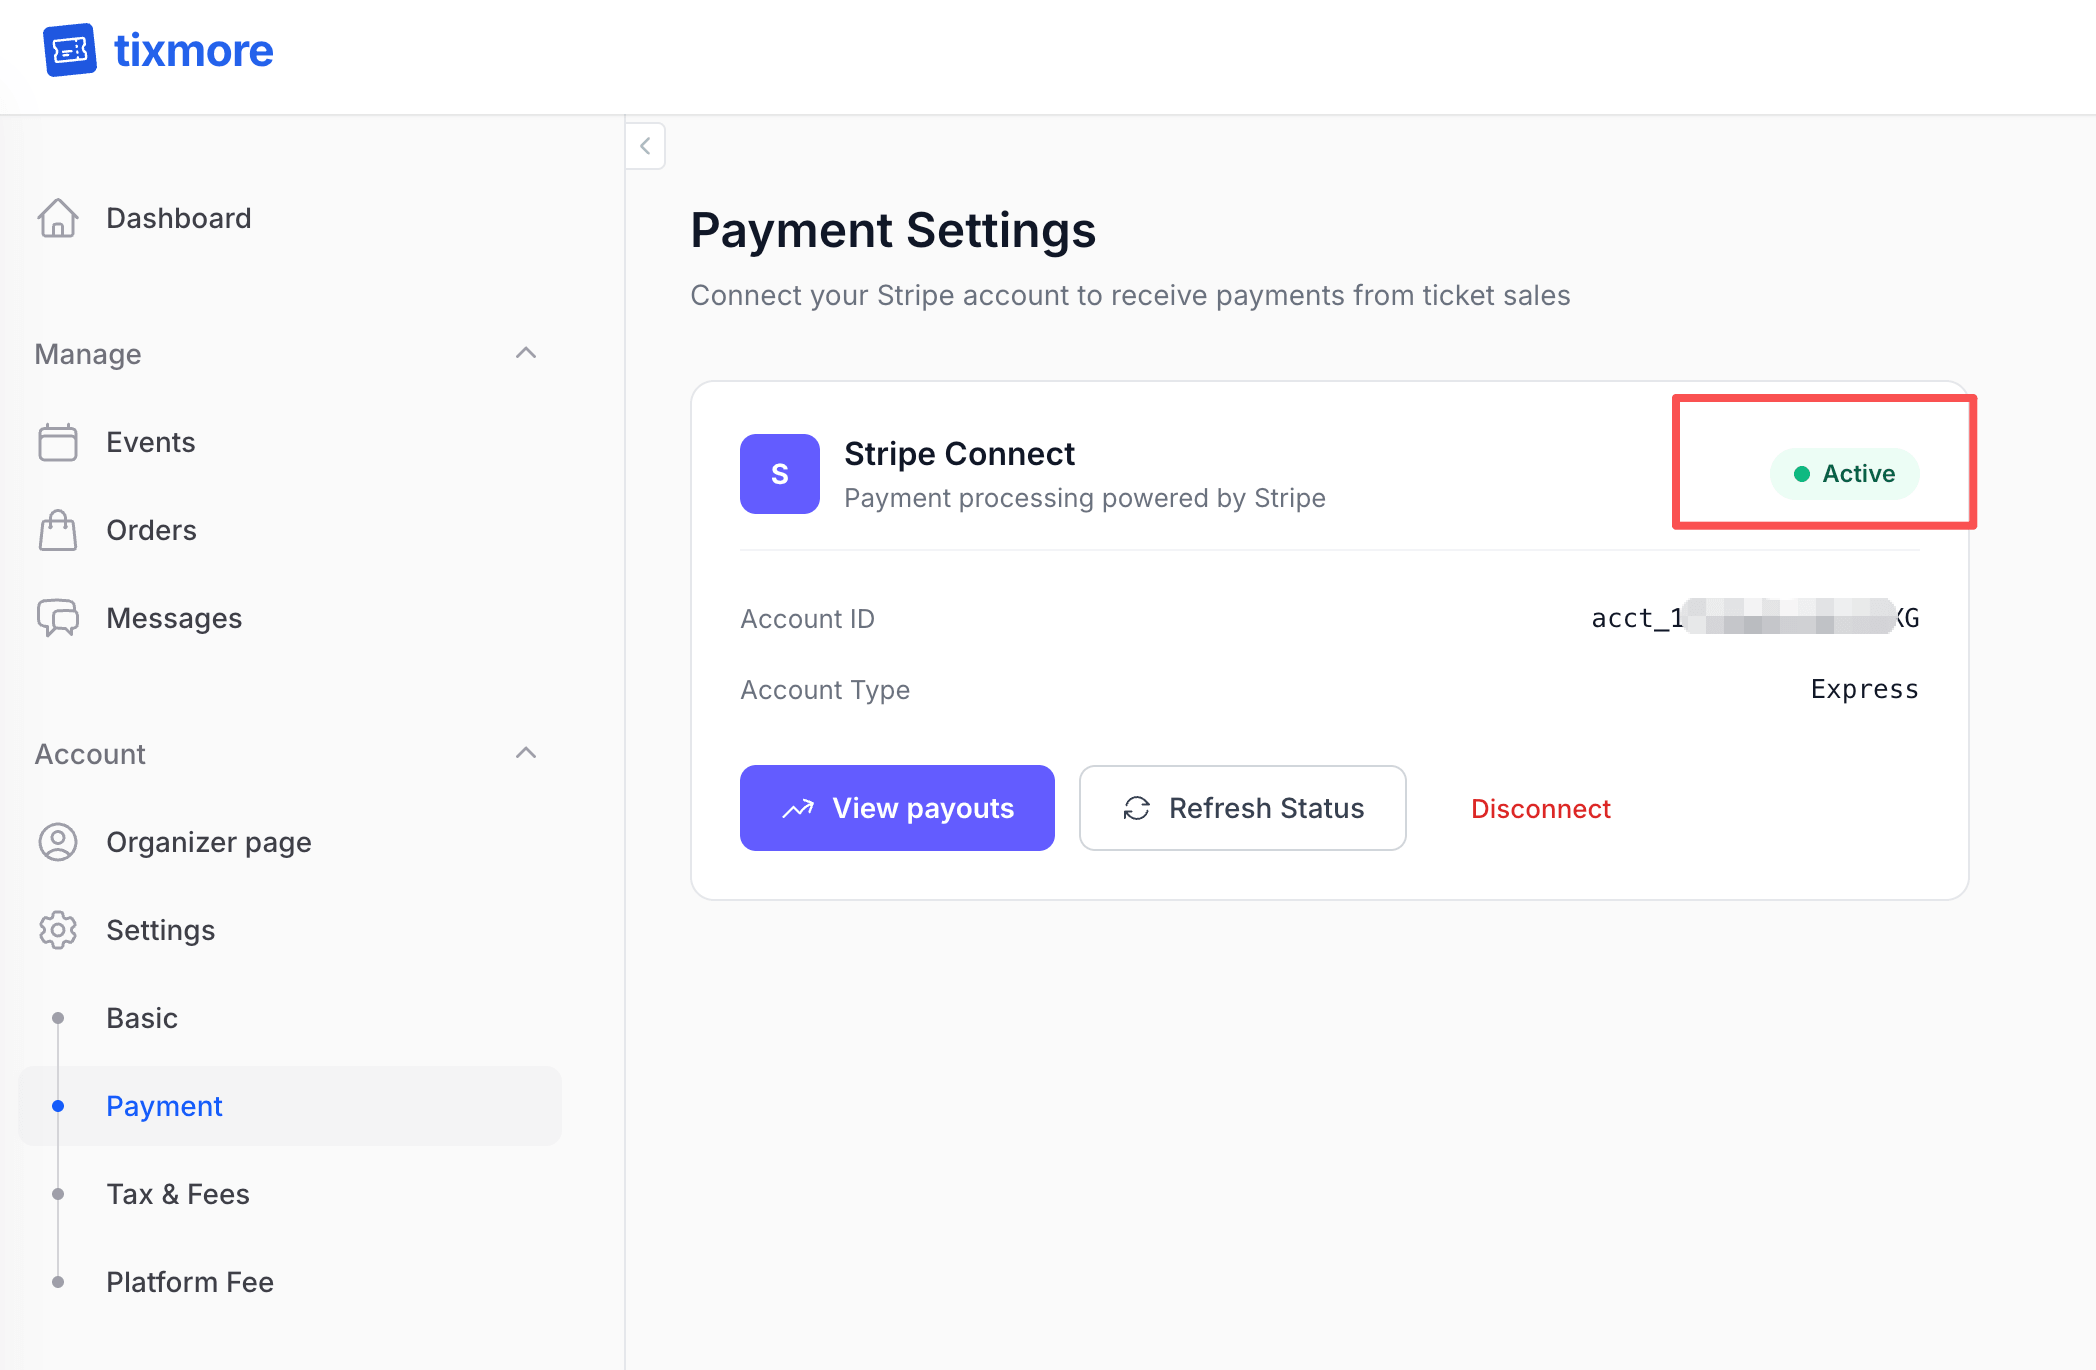
Once you finish, Stripe sends you back to Tixmore and the card now shows a green ● Active badge. That's it — you can now accept payments. 🎉
From here you'll see a few things:
- Account ID & Account Type — your connected Stripe account reference (type "Express").
- View payouts — opens your Stripe Express dashboard, where you can see your balance, payout schedule, transaction history, and update your bank details.
- Refresh Status — re-checks your status with Stripe (useful if verification was still in progress).
- Disconnect — unlinks your Stripe account. You won't be able to receive payments again until you reconnect.
What if the status says "Pending" or "Restricted"?
That simply means Stripe still needs a bit more information before it can fully enable payments — often an ID upload or an extra business detail. Click the Complete verification button shown on the card to finish. Once Stripe approves, the badge flips to Active automatically.
How you actually get paid
When an attendee buys a ticket:
- Their payment goes directly into your Stripe account (minus Tixmore's platform fee and Stripe's standard processing fee).
- Stripe pays out to your bank on a rolling schedule, which you control in your Stripe dashboard.
You can review your balance, payout schedule, and full transaction history anytime by clicking View payouts on the Payment Settings card, which opens your Stripe Express dashboard.
Frequently asked questions
Do I need Stripe for a free event? No. Stripe is only required for paid tickets. Free events work without it.
Is it safe to enter my bank information? Yes. Your details go straight to Stripe, which is PCI-compliant and trusted by millions of businesses. Tixmore never sees or stores your bank or card credentials.
What does it cost to connect? Connecting is free. You only pay Stripe's standard per-transaction processing fee and Tixmore's platform fee when you actually sell a ticket.
Can I change my country or currency later? No — they're locked the moment you connect. Choose carefully. If you picked the wrong one before finishing setup, you can disconnect and reconnect with the correct country/region.
Which countries are supported? Tixmore supports organizers across the US, UK, Canada, Switzerland, the entire EEA, and major Asia-Pacific and Gulf markets including Japan, Hong Kong, Singapore, Australia, New Zealand, Malaysia, Thailand, and the UAE. If your country isn't listed in the picker, it isn't supported yet.
Stuck on any step? Email us at [email protected] — we'll help you get connected and selling.