Registration Questions
Every event needs different information from its attendees. A kids' art class might need costume sizes. A conference might need dietary preferences. A corporate event might need company names.
Registration Questions let you add custom fields to the checkout form — so you collect exactly the information you need, without cluttering the default flow.
Where to Find It
In your Event Panel sidebar, go to Event Setup → Registration Questions.
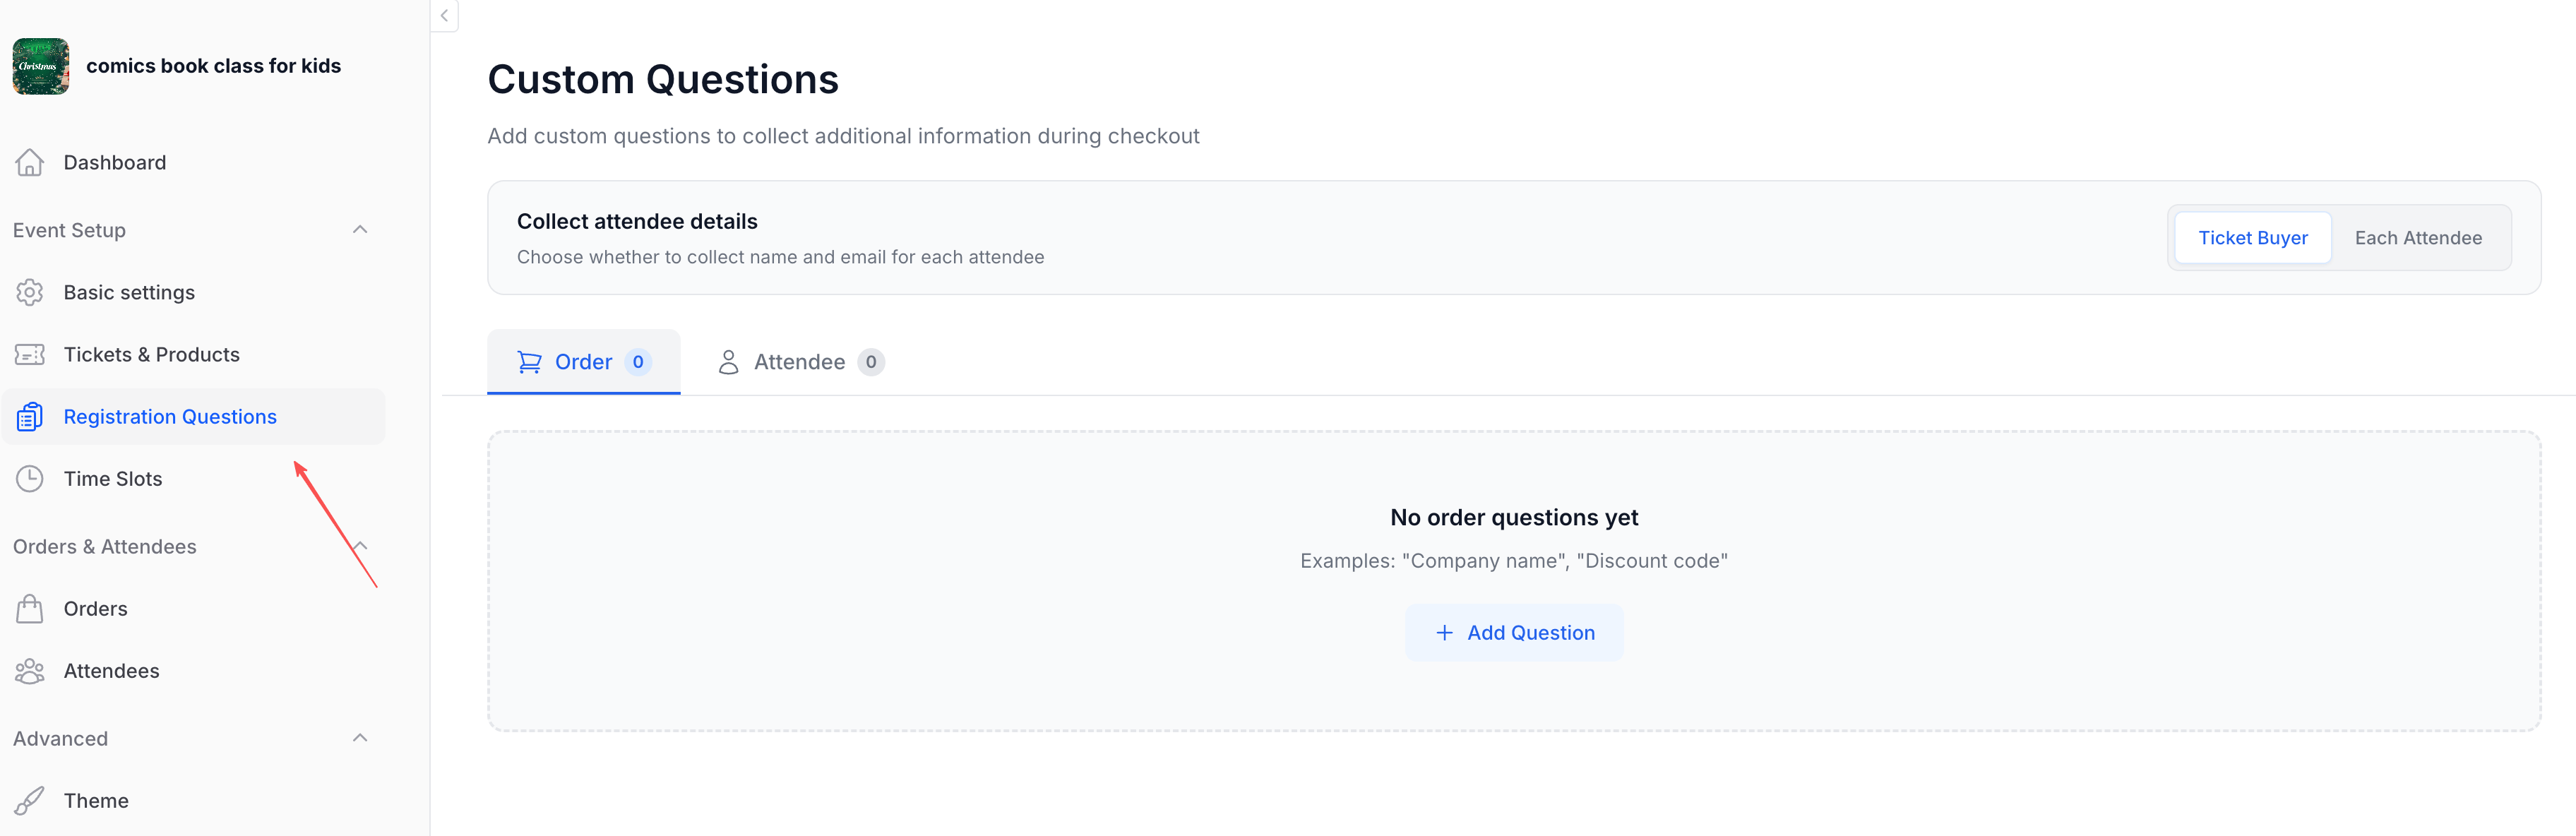
The page has three areas:
- Collect attendee details — A toggle at the top that controls whether to collect name and email for each attendee, or only for the ticket buyer
- Order tab — Questions asked once per order (about the purchase as a whole)
- Attendee tab — Questions asked for each individual ticket holder
Order vs. Attendee Questions
This is the most important concept to understand. Questions live in one of two scopes:
Order Questions
Asked once per order, regardless of how many tickets are purchased. These appear in an "Additional Information" section during checkout.
Use for:
- Company name
- Discount code or referral source
- "How did you hear about us?"
- Special requests for the entire group
- Invoice details
Attendee Questions
Asked once per ticket holder. If someone buys 3 tickets, they'll answer these questions 3 times — once for each attendee.
Use for:
- T-shirt size or costume size
- Dietary restrictions (per person)
- Skill level or experience
- Emergency contact
- Any information that varies by individual
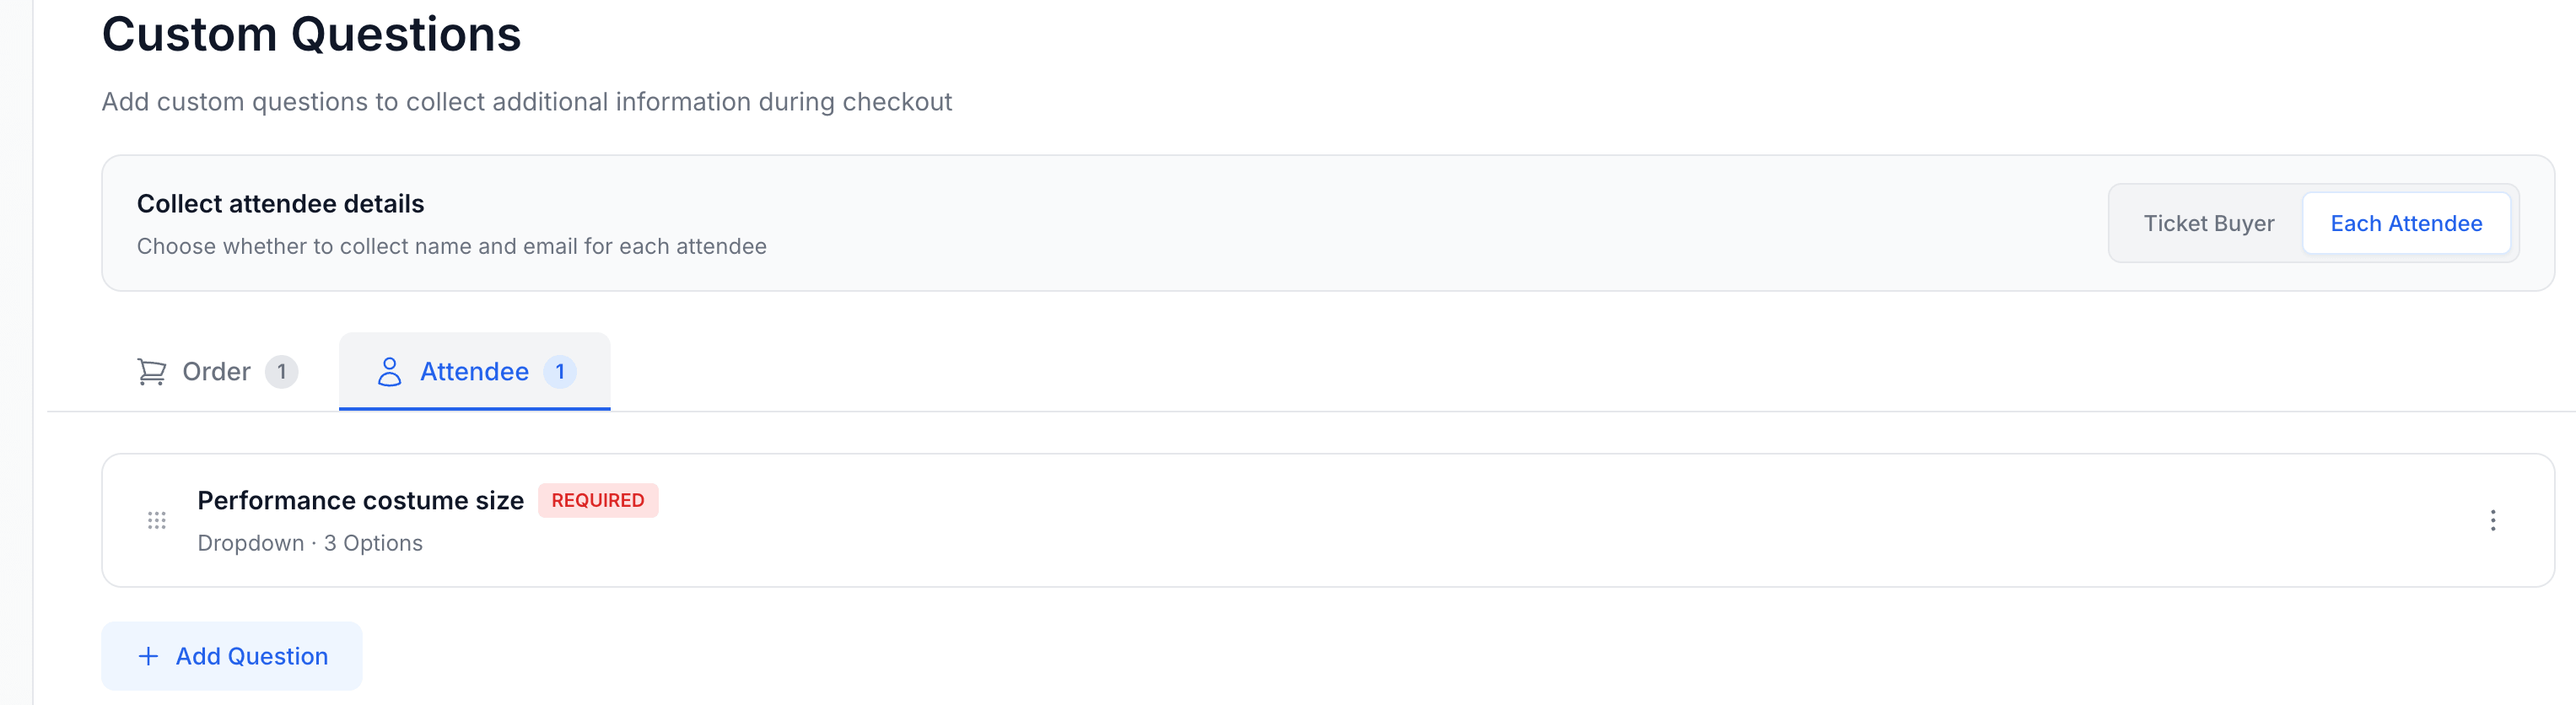
Each tab shows its question count. In the example above, there's 1 order question and 1 attendee question.
Ask yourself: "Does the answer change if there are multiple attendees?" If yes → Attendee question. If no → Order question.
"Company name" is the same for all tickets in one order → Order. "Costume size" differs per person → Attendee.
Collect Attendee Details
At the top of the page, you'll see a toggle: Ticket Buyer or Each Attendee.
| Mode | What happens |
|---|---|
| Ticket Buyer | Only the buyer's name and email are collected. Simpler checkout — good for events where you don't need individual attendee info |
| Each Attendee | Name and email are collected for every ticket holder. The buyer fills in their own info, then provides details for each additional attendee |
Choose Each Attendee if you need to know who's actually attending (for name badges, check-in lists, or per-person questions). Choose Ticket Buyer if only the purchaser matters.
Creating a Question
Click "+ Add Question" under the relevant tab (Order or Attendee) to open the question form.
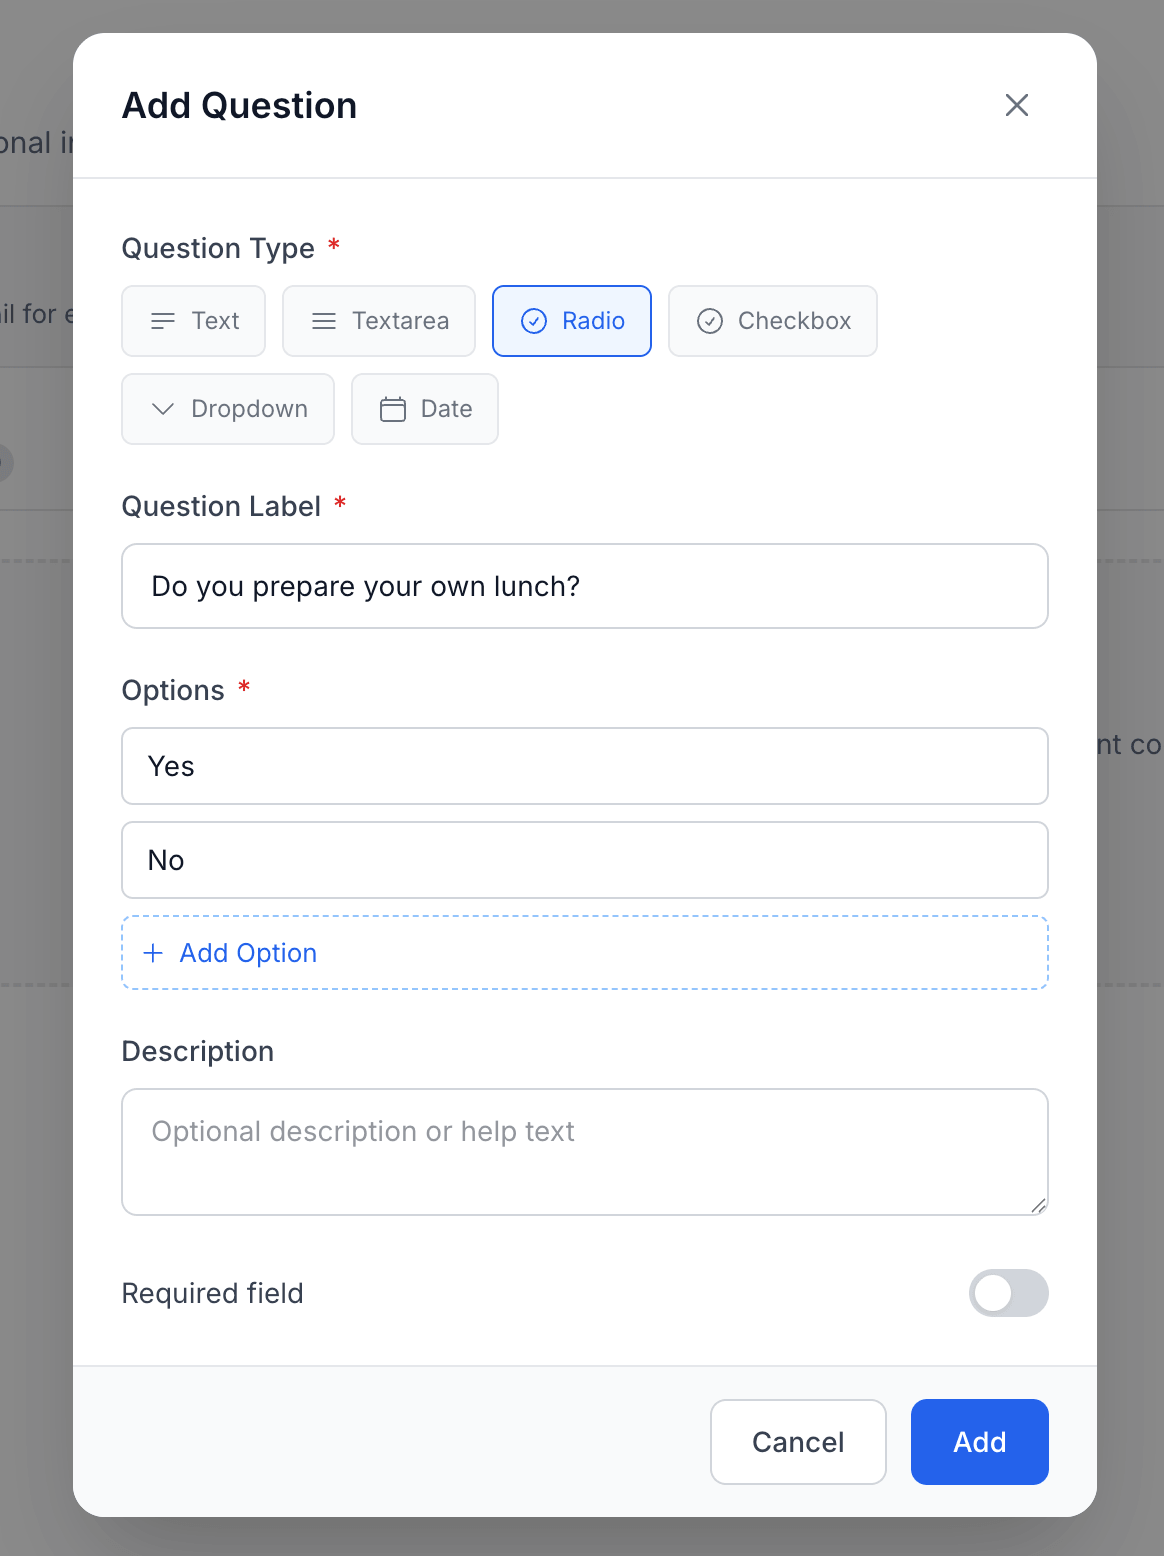
Question Type
Choose the input type that fits your question:
| Type | Description | Best for |
|---|---|---|
| Text | Single line of text | Names, short answers, codes |
| Textarea | Multi-line text box | Comments, special requests, detailed responses |
| Radio | Single choice from a list | Yes/No questions, mutually exclusive options |
| Checkbox | Multiple choices from a list | Select-all-that-apply questions |
| Dropdown | Single choice from a dropdown menu | Long lists of options (countries, sizes, departments) |
| Date | Date picker | Birth dates, arrival dates, certification dates |
Question Label
The text attendees see — keep it clear and concise. Examples:
- "Do you prepare your own lunch?"
- "Performance costume size"
- "Company name"
- "Dietary restrictions"
Maximum 64 characters.
Options
For Radio, Checkbox, and Dropdown types, you need to define the available choices. At least 2 options are required.
Click "+ Add Option" to add more. Click the x to remove one.
Description
Optional help text shown below the question. Use it to clarify what you're asking or provide examples — e.g., "Select the size for the performance costume provided on the day".
Maximum 255 characters.
Required Field
Toggle this on if the attendee must answer this question to complete checkout. Required questions are marked with a red REQUIRED badge in your dashboard and a red asterisk (*) on the checkout form.
Leave it off for optional questions — the field will appear but can be left blank.
If a question is required, attendees cannot complete their purchase without answering it. Only mark questions as required if you truly need the information to run your event. Too many required fields increase checkout abandonment.
Managing Questions
Once created, questions appear as cards in their respective tab.
Each card shows:
- The question label
- A REQUIRED badge (if applicable)
- The question type and option count (e.g., "Dropdown - 3 Options")
Reorder
Drag the handle (⠿) on the left side of each card to rearrange questions. The display order on the checkout form matches the order you set here.
Edit
Click the menu icon (⋮) on the right side of a question card, then select Edit to modify the question type, label, options, description, or required setting.
Delete
Click the menu icon (⋮) and select Delete to remove a question. This is a soft delete — existing order answers are preserved, but the question won't appear on future checkouts.
How It Looks at Checkout
When attendees go through the checkout flow, your custom questions appear alongside the standard contact fields.
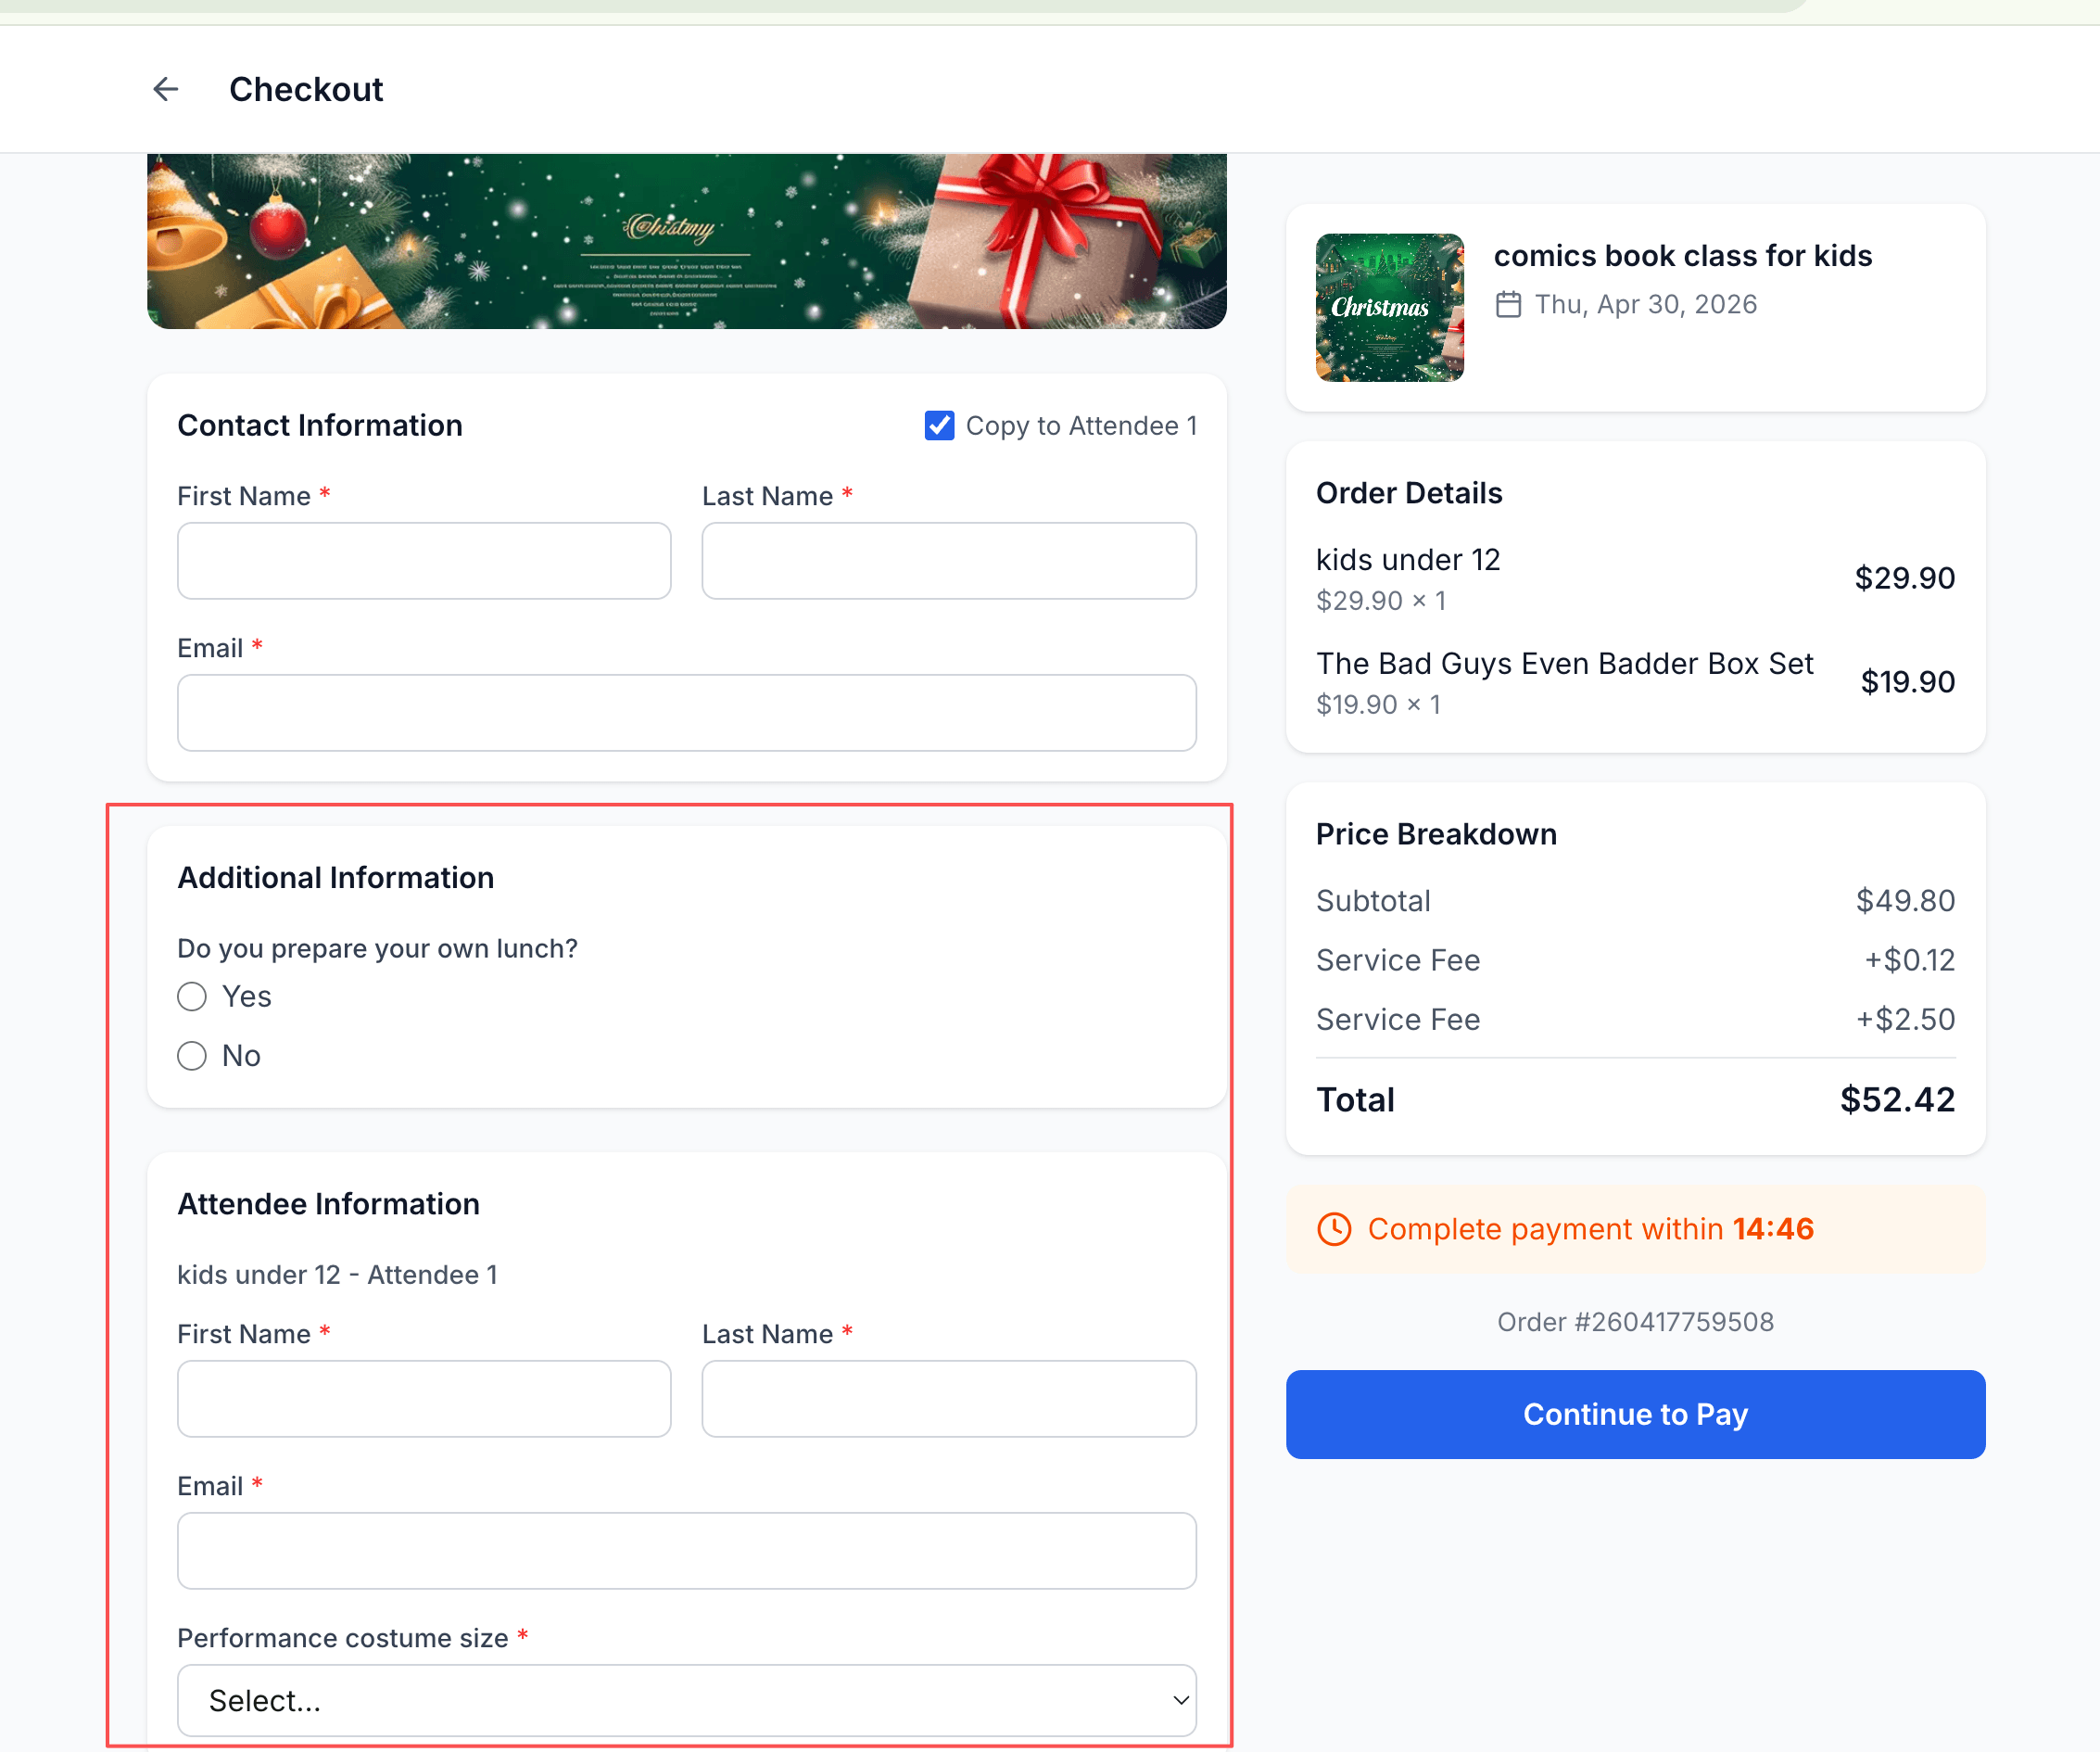
The checkout form is structured as:
- Contact Information — Buyer's name and email (always shown)
- Additional Information — Order-level custom questions (if any)
- Attendee Information — Per-attendee name, email, and custom questions (if "Each Attendee" mode is on and attendee questions exist)
- Order summary and payment
Required fields show a red asterisk (*). The attendee section repeats for each ticket — e.g., if the buyer purchased 2 "Kids under 12" tickets, they'll see Attendee 1 and Attendee 2 sections, each with the attendee-level questions.
Viewing Answers
After attendees complete checkout, their answers are stored with the order. You can view them in:
- Orders — Each order record contains the form answers
- Attendees — Each attendee record shows their individual answers
This data is available for export and can help with event logistics — assigning costume sizes, preparing meals, printing name badges, etc.
Tips & Best Practices
Keep it minimal. Every extra question adds friction. Only ask what you genuinely need for event operations. If it's "nice to have" but not actionable, skip it.
Use the right type. Don't use a text field when a dropdown would work. Structured data (radio, checkbox, dropdown) is easier to aggregate and act on than free text.
Make most questions optional. Reserve "required" for information you can't run the event without — like costume sizes for a performance. Things like "How did you hear about us?" should be optional.
Write clear labels. The question label is all the attendee sees in most cases. "T-shirt size" is better than "Size". "Do you have dietary restrictions?" is better than "Diet".
Use descriptions for context. If a question might be confusing, add a short description. For example, a "Skill level" dropdown might have the description: "This helps us assign you to the right group".
Test your checkout. After adding questions, preview your event page and go through the ticket purchase flow to see how the questions look from the attendee's perspective.
Quick Reference
| Action | How to |
|---|---|
| Add an order question | Order tab → + Add Question → configure → Add |
| Add a per-attendee question | Attendee tab → + Add Question → configure → Add |
| Make a question required | Toggle Required field on when creating or editing |
| Collect name/email per attendee | Set Collect attendee details to Each Attendee |
| Reorder questions | Drag the ⠿ handle on each card |
| Edit or delete | Click the ⋮ menu on a question card |
Next: customize the look of your event page with the Event Page & Theme guide, or set up time slots for recurring sessions.