Creating an Event
Creating an event on Tixmore is designed to be fast. You can go from zero to a live event page in under 5 minutes. Here's how.
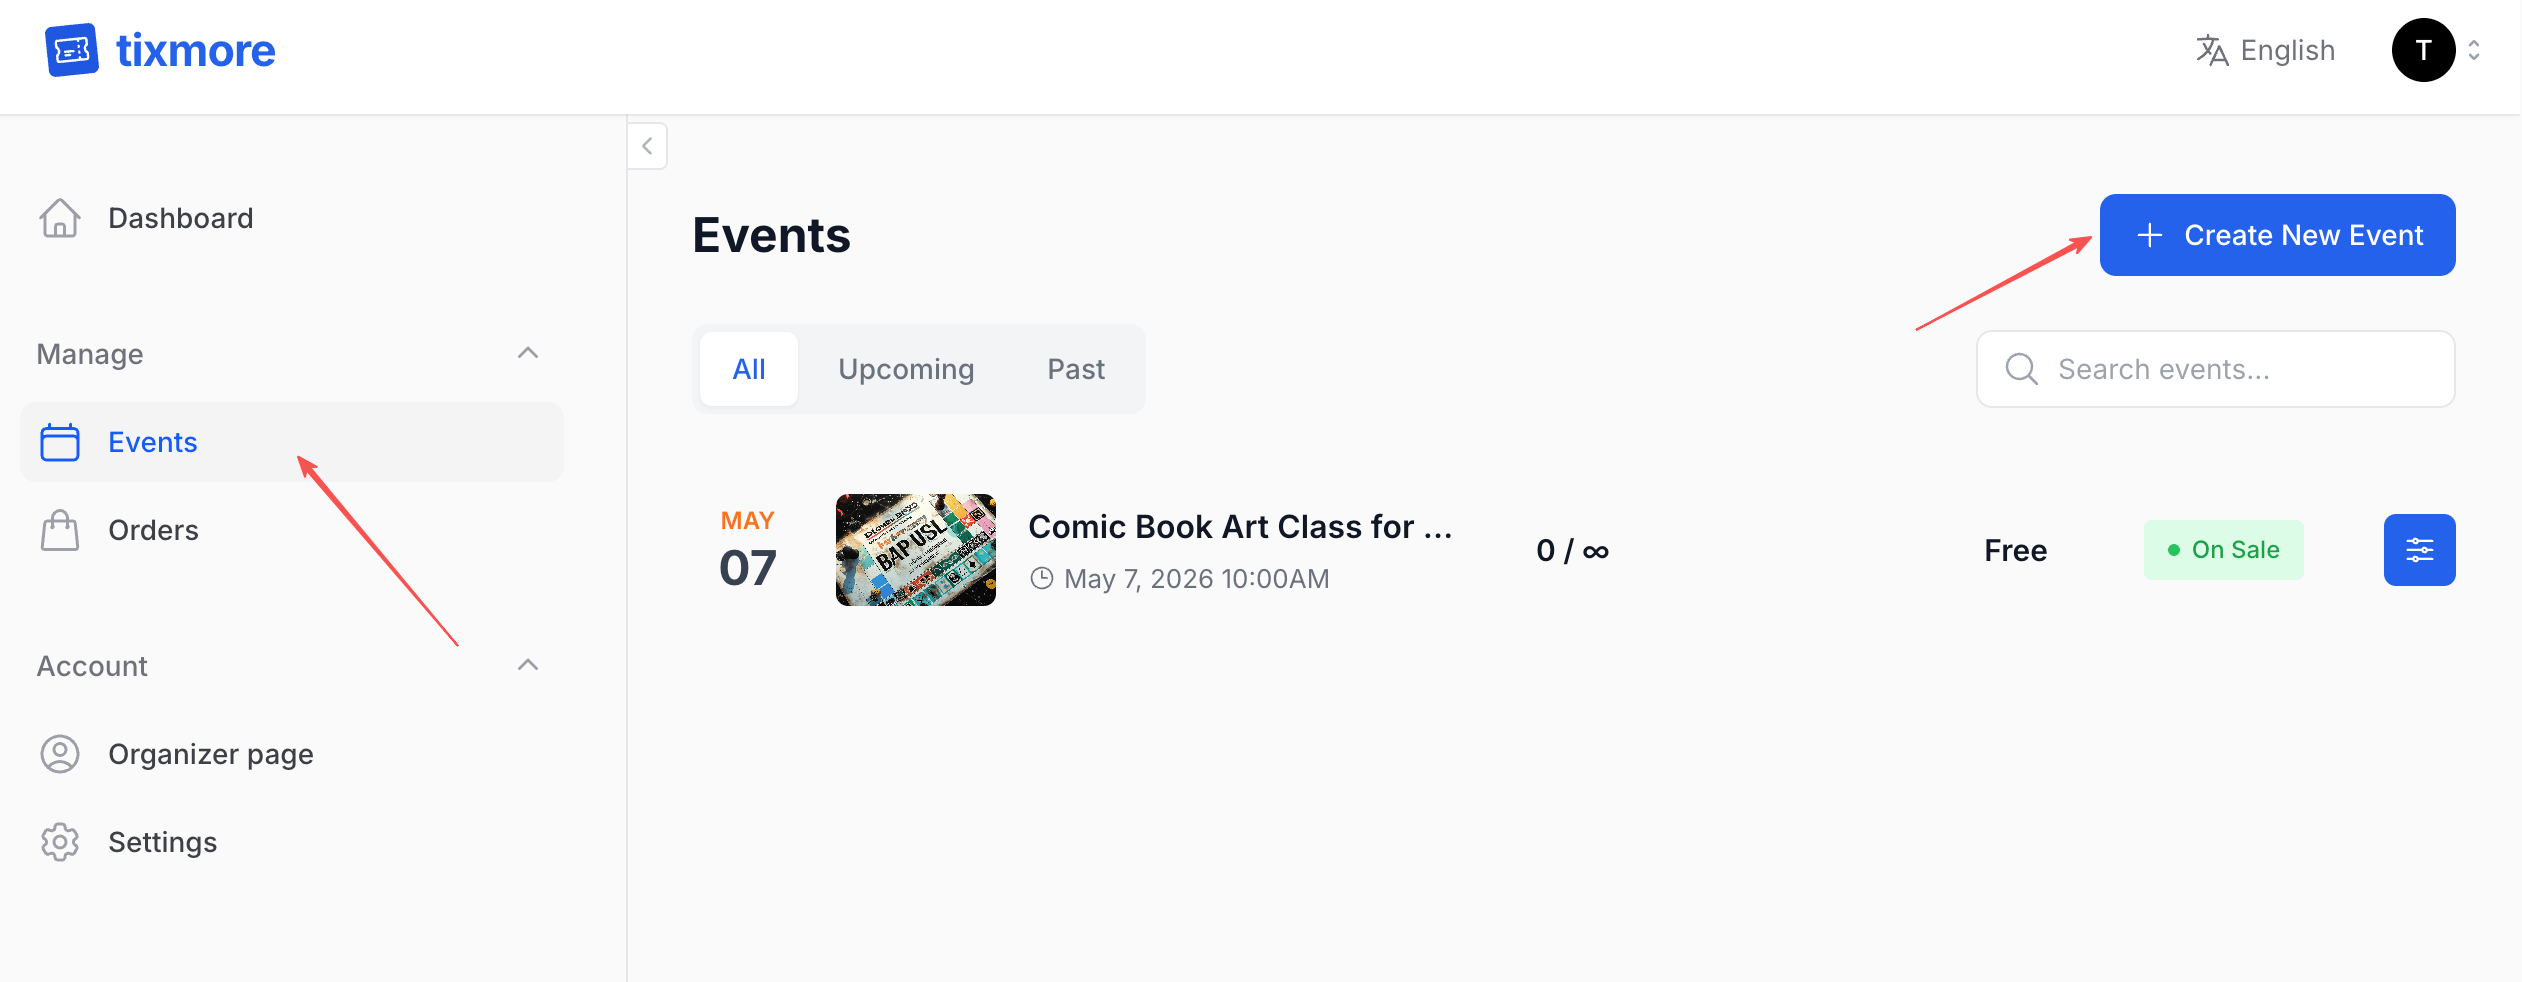
Step 1: Start from the Events Page
Head to Manage → Events in your dashboard. You'll see a list of all your events (or an empty state if you're just getting started). Click the "+ Create New Event" button in the top right.
Step 2: Fill in the Basics
A dialog will pop up asking for just the essentials — the minimum you need to get started.
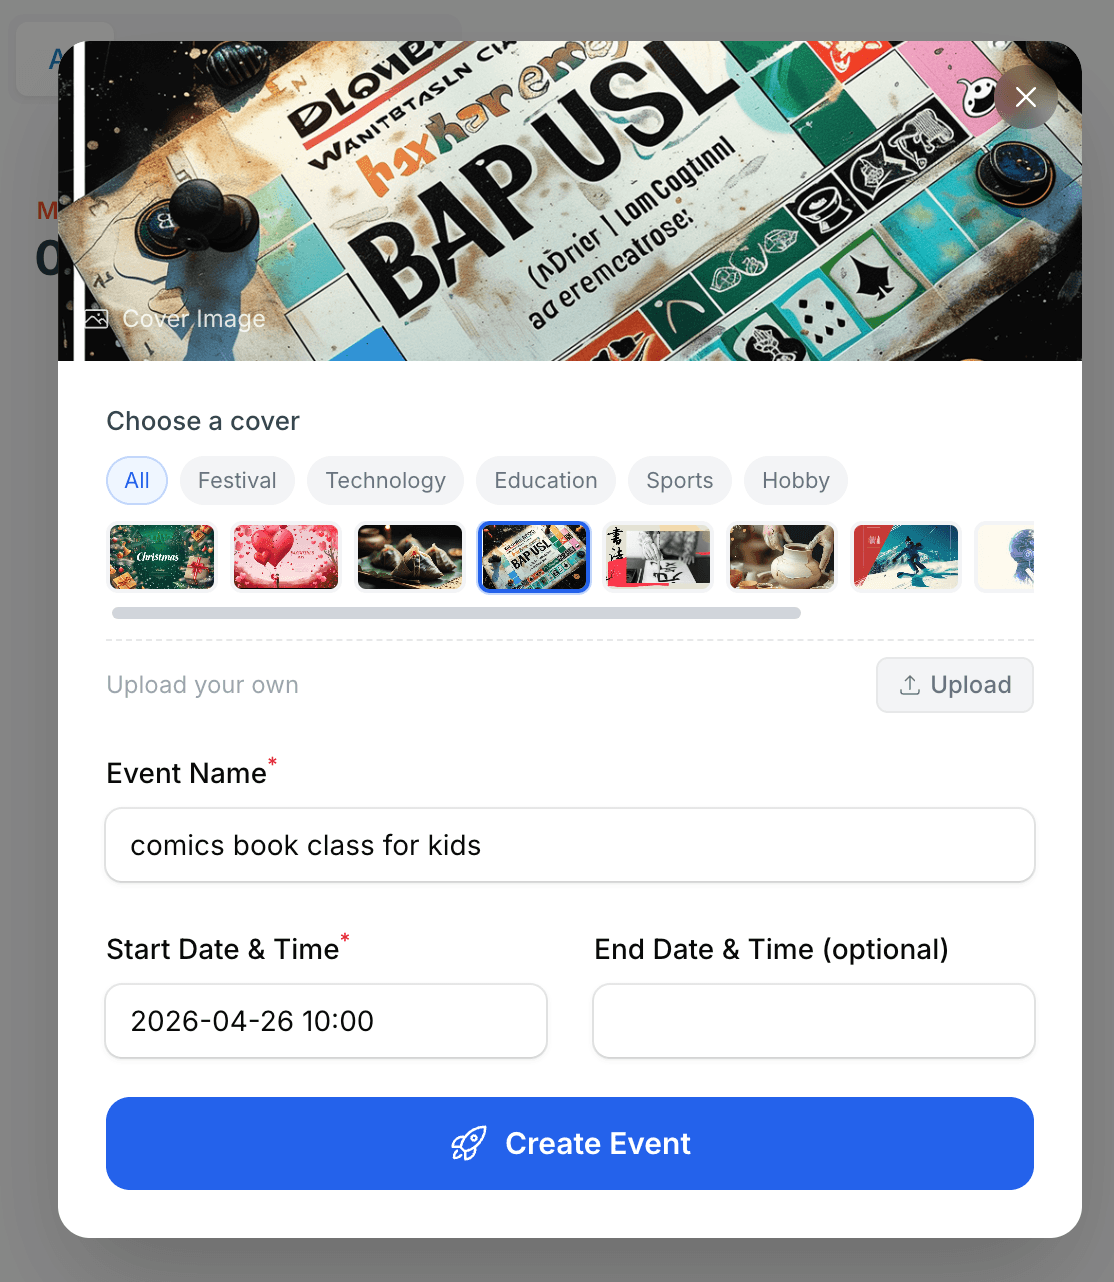
Cover Image
Pick a cover image from Tixmore's built-in gallery, or upload your own. The gallery is organized by category — Festival, Technology, Education, Sports, Hobby — so you can quickly find something that fits your vibe.
Not sure what to use? Just pick anything for now — you can always change it later in the event settings.
Event Name
Give your event a name. This is what attendees will see on your event page and in search results. Keep it clear and descriptive:
- ✅ "Comic Book Art Class for Kids"
- ✅ "TechConf Asia 2026"
- ❌ "Event 1" (you'll forget what this is in a week)
Start Date & Time
When does your event begin? Enter the date and time. This uses the timezone you configured in your account settings.
End Date & Time is optional — some events (like workshops or meetups) don't need an explicit end time. If you leave it blank, the event page will just show the start time.
Once you've filled in these fields, click "Create Event" and you're in.
Step 3: You're in the Event Panel
After creating, you'll land in the Event Panel — a dedicated dashboard for this specific event. This is your command center.
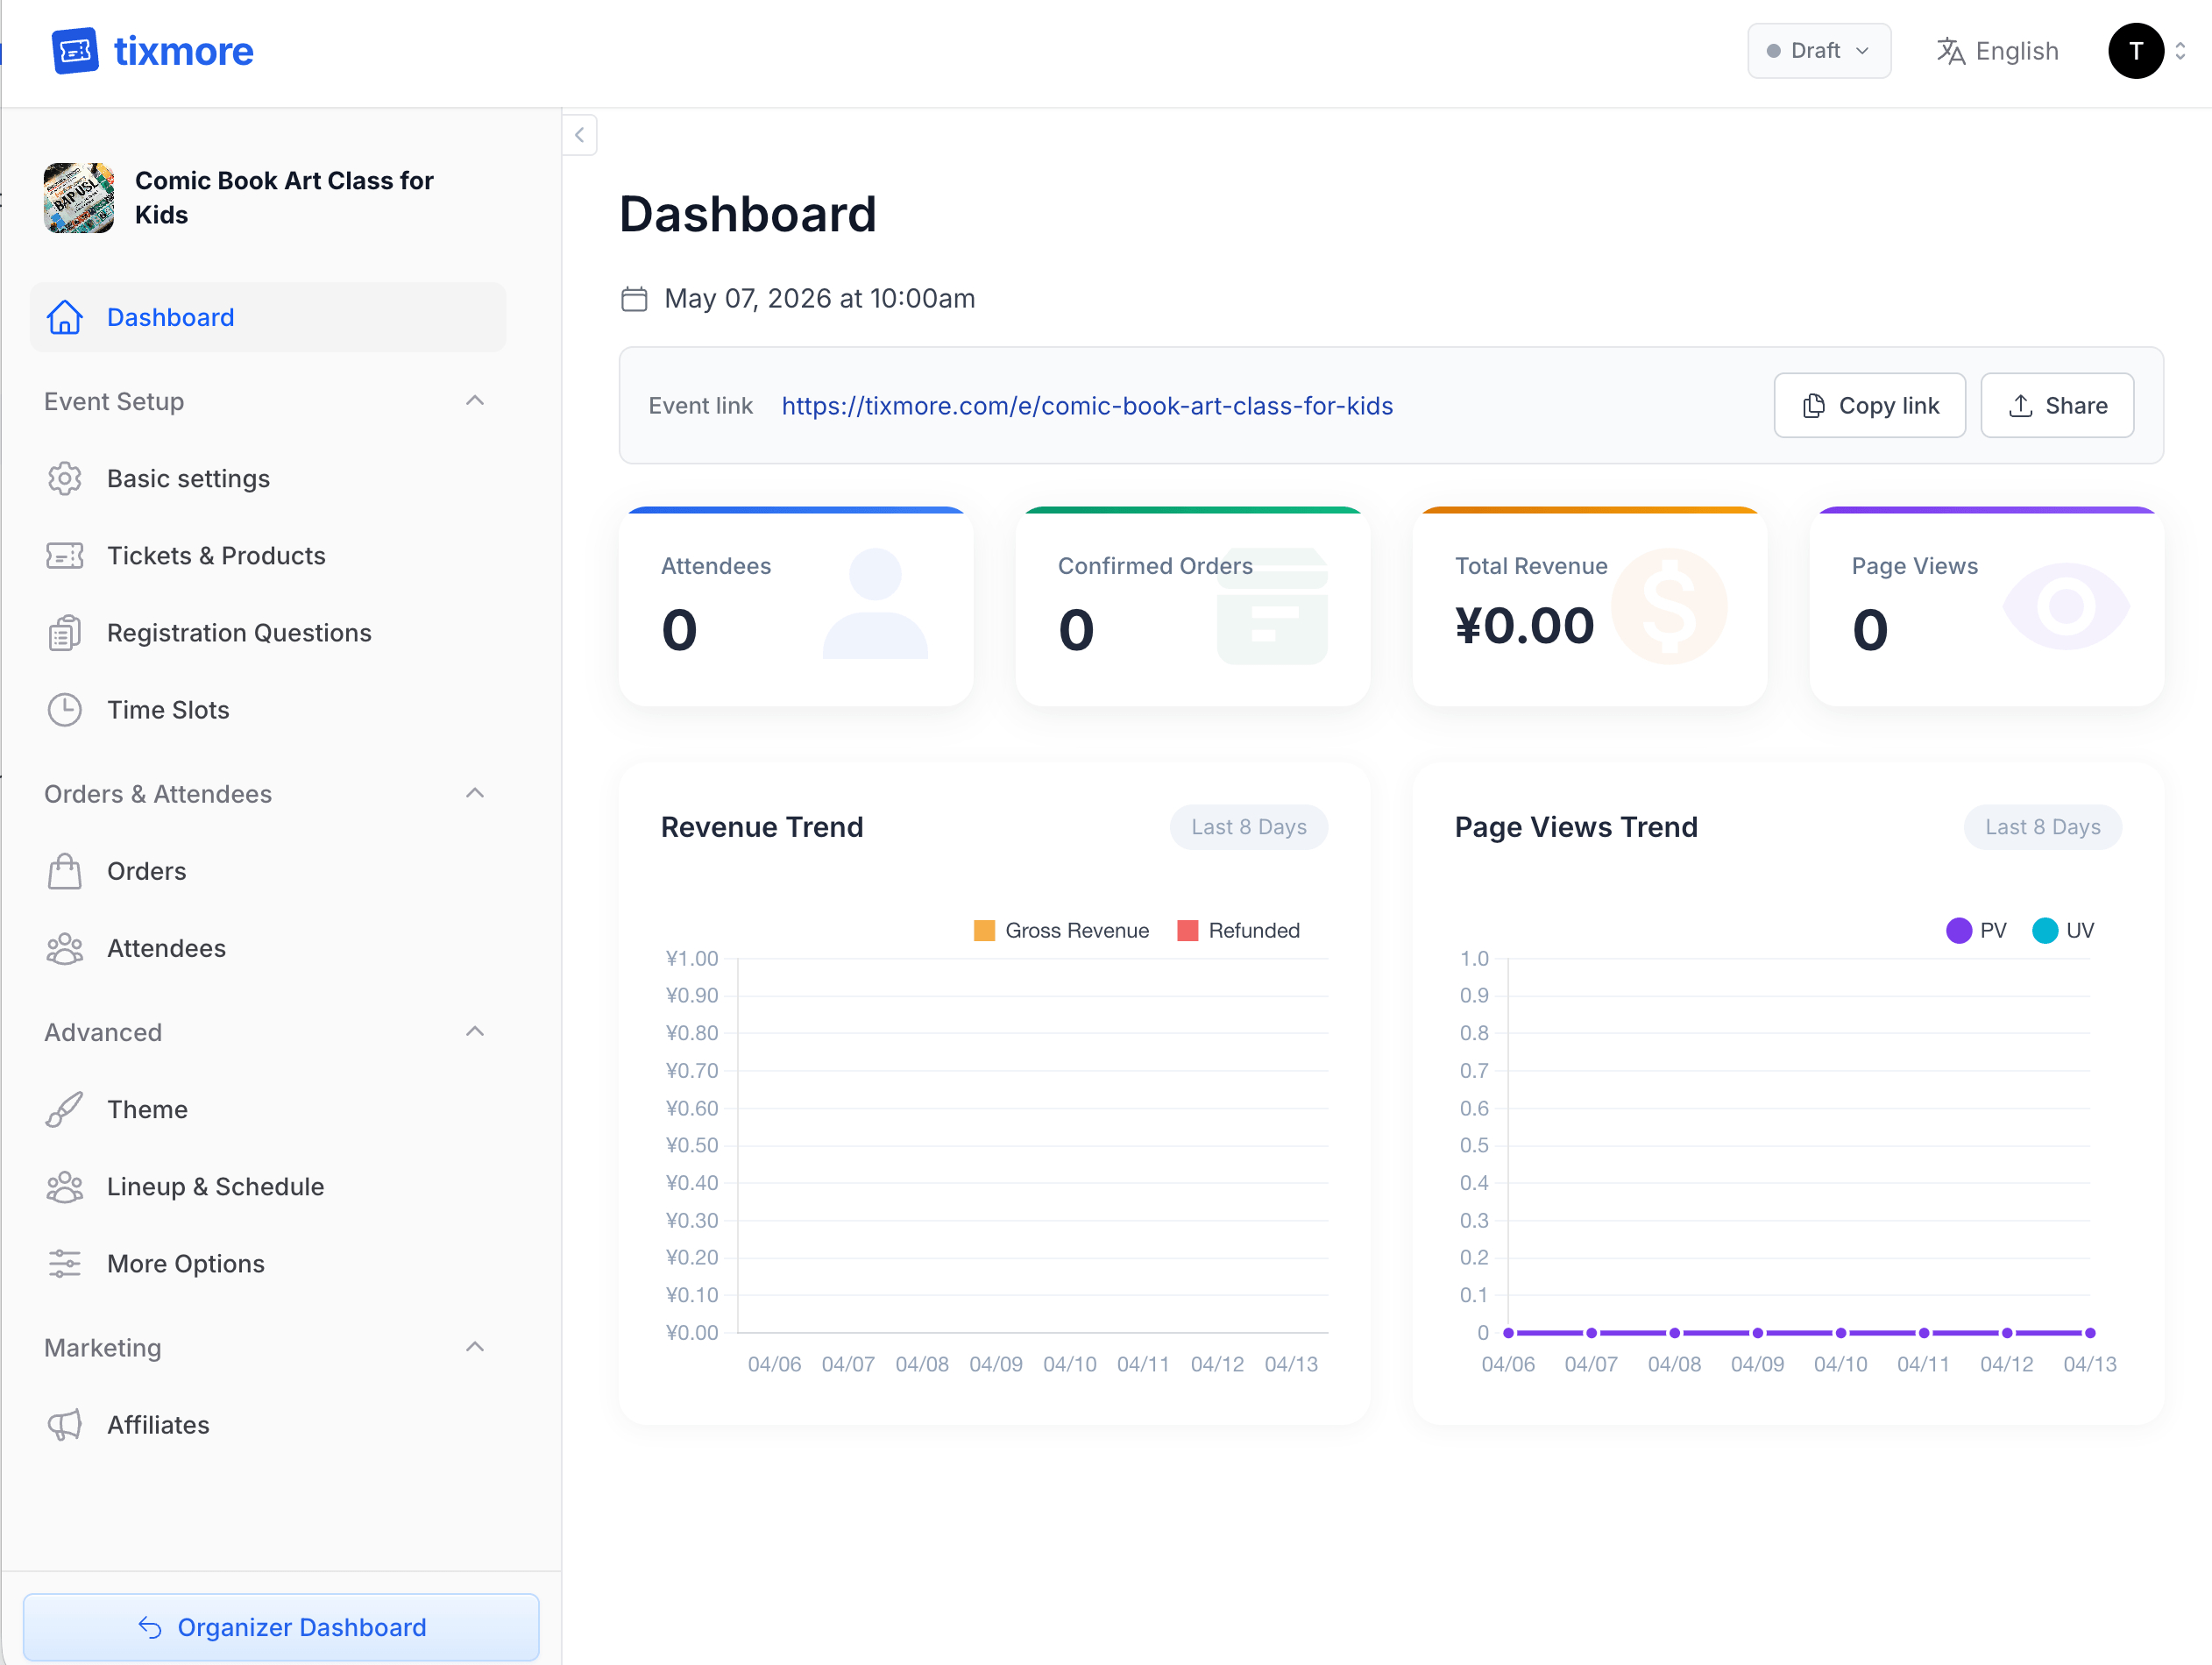
From the left sidebar, you can access everything:
| Section | What it does |
|---|---|
| Dashboard | At-a-glance stats — attendees, orders, revenue, and page views |
| Basic Settings | Edit title, dates, location, description, and cover images |
| Tickets & Products | Create ticket types and add-on products |
| Registration Questions | Customize the checkout form |
| Time Slots | Set up multi-session or recurring time slots |
| Orders | View and manage all orders |
| Attendees | See who's coming, manage check-ins |
| Theme | Customize colors, fonts, and the look of your event page |
| Lineup & Schedule | Add performers, speakers, and an event agenda |
| More Options | Countdown timer, custom button text, attendee list visibility |
| Affiliates | Set up referral partners with trackable links |
You don't need to configure all of these right away. The only thing you must do before going live is add at least one ticket.
Step 4: Refine Your Event Details
Click Basic Settings to flesh out your event.
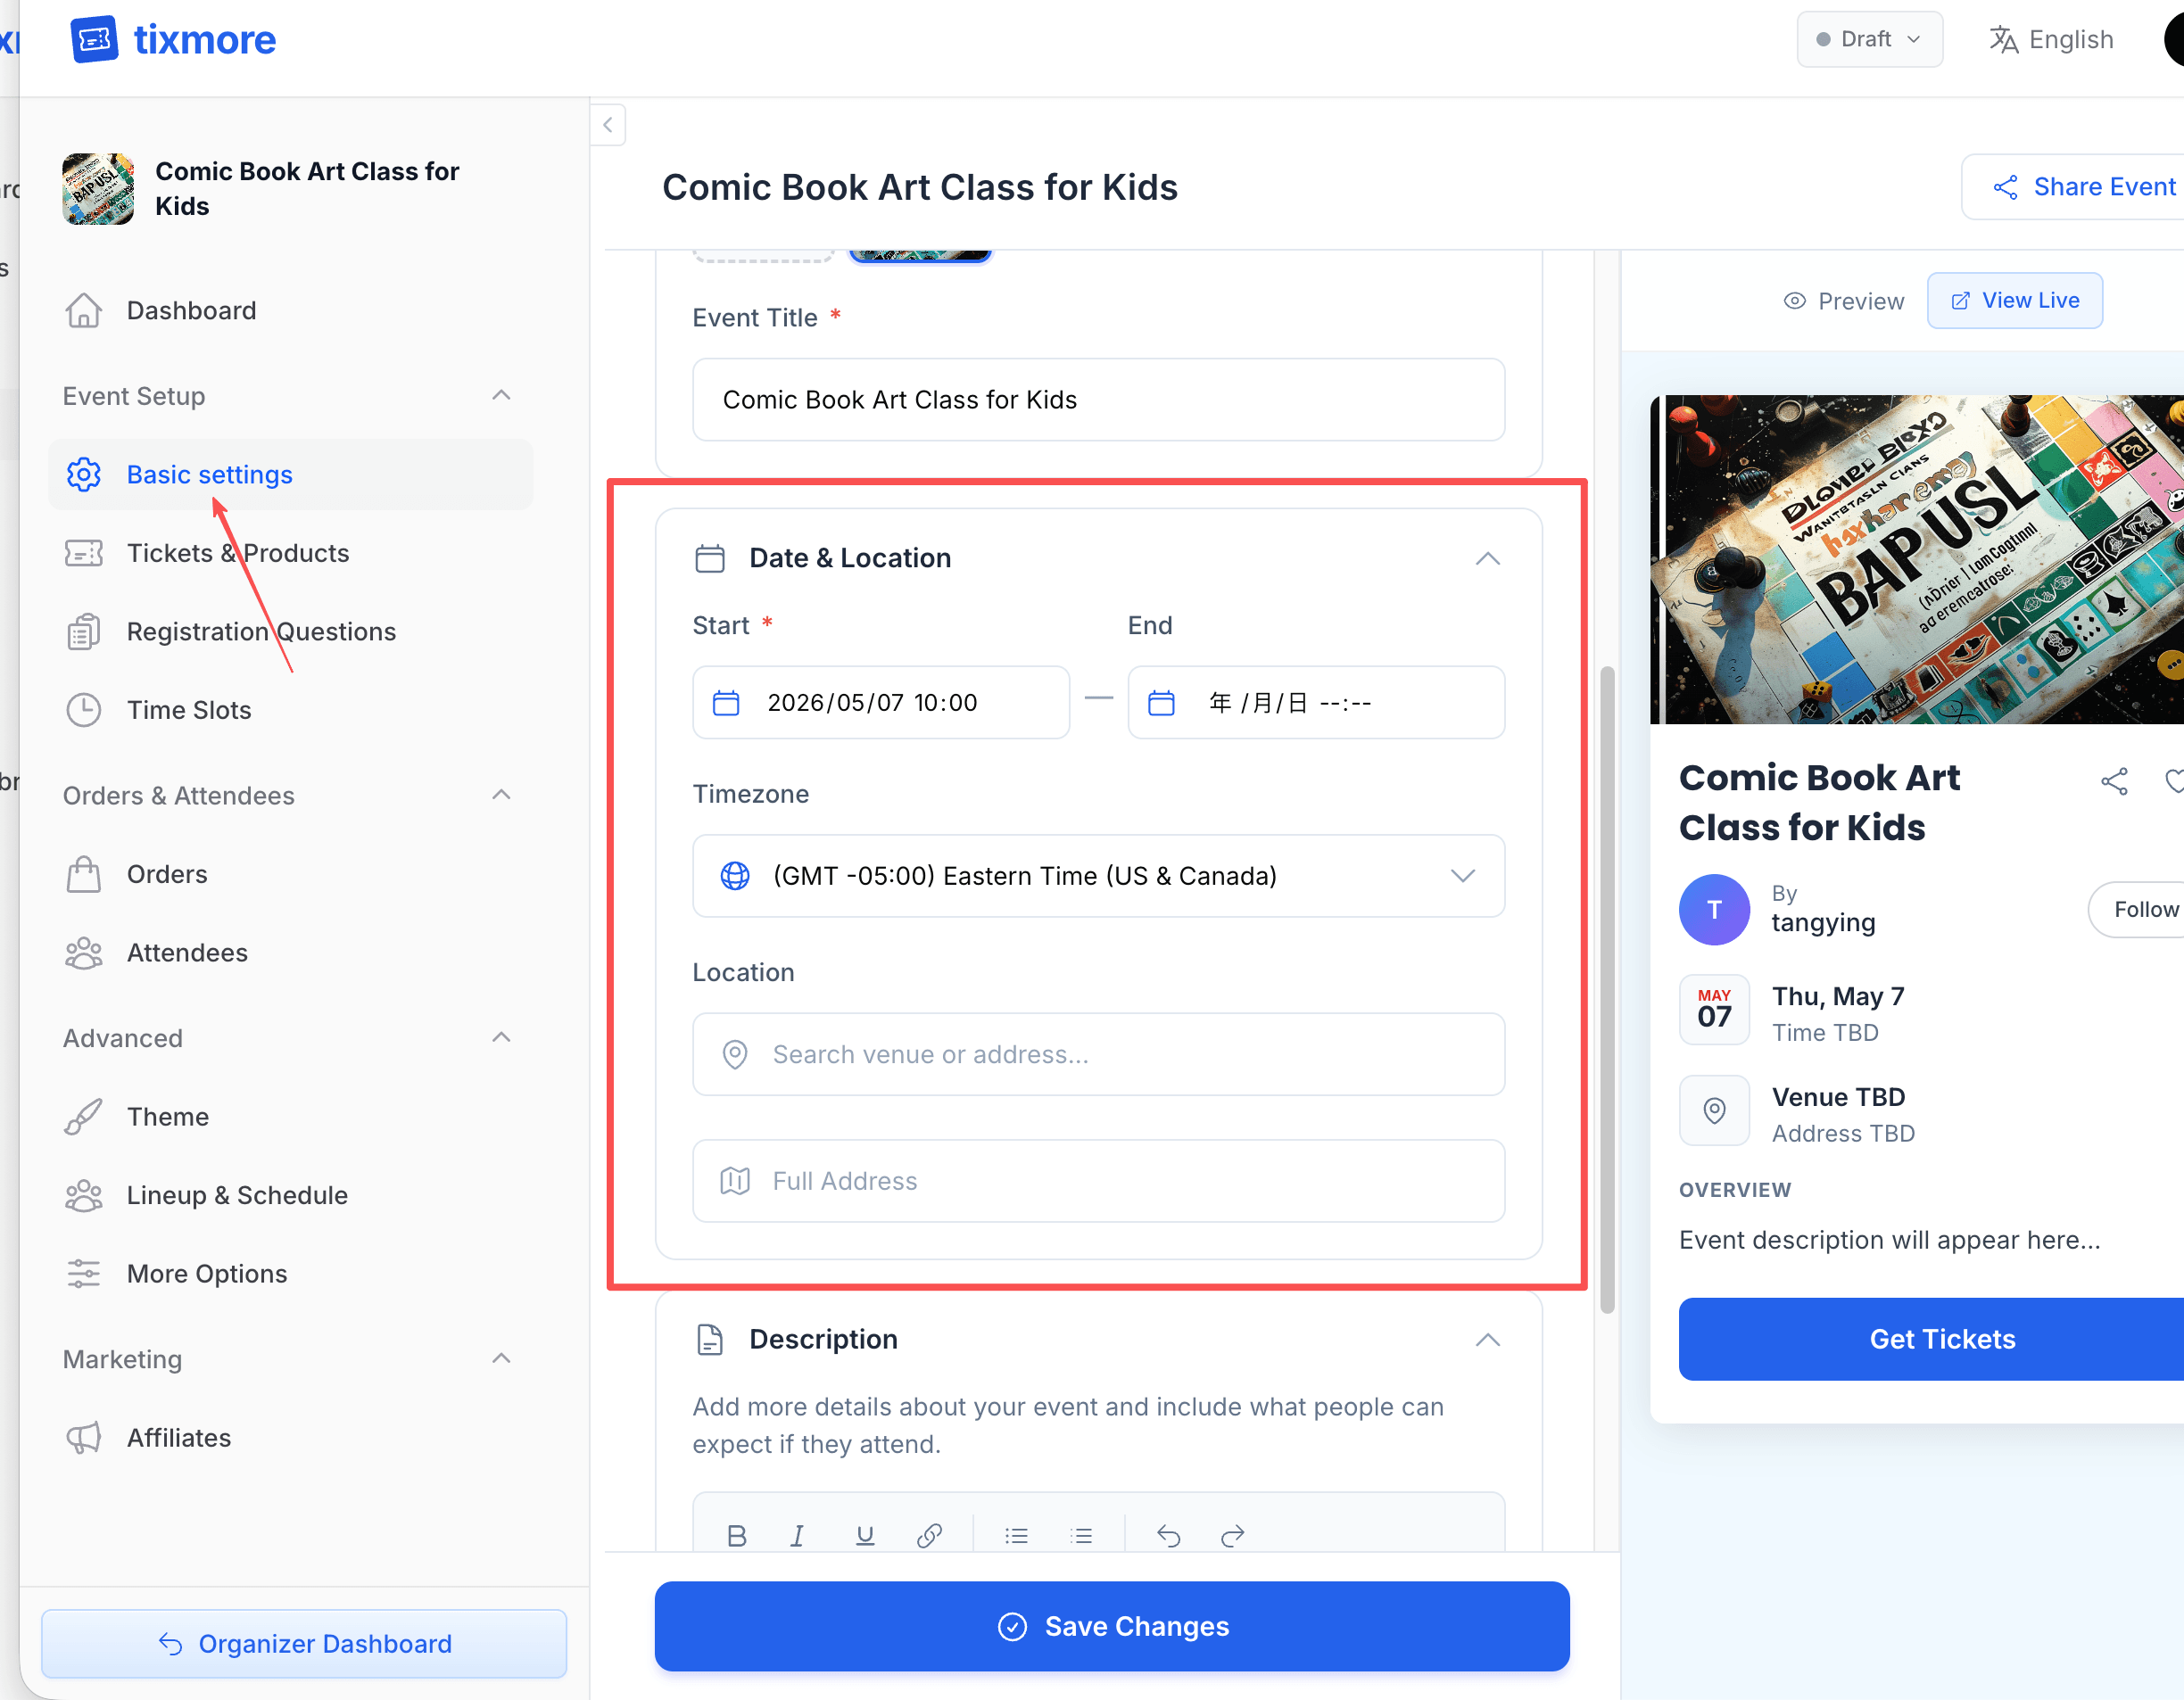
Here you can:
- Update the title if you want to tweak it
- Set the location — search for a venue or address, and it will be displayed with a map on your event page
- Write a description — tell attendees what to expect. The editor supports bold, italic, links, lists, and more. A good description answers: What is this event? Who is it for? What will attendees experience?
- Upload additional cover images — you can have multiple, and they'll display as a carousel
The right-side preview updates in real time. Use "Preview" to check the mobile view, or "View Live" to open the actual event page in a new tab.
Step 5: Add Tickets
No tickets = no one can register. Head to Tickets & Products and click "+ Create Ticket".
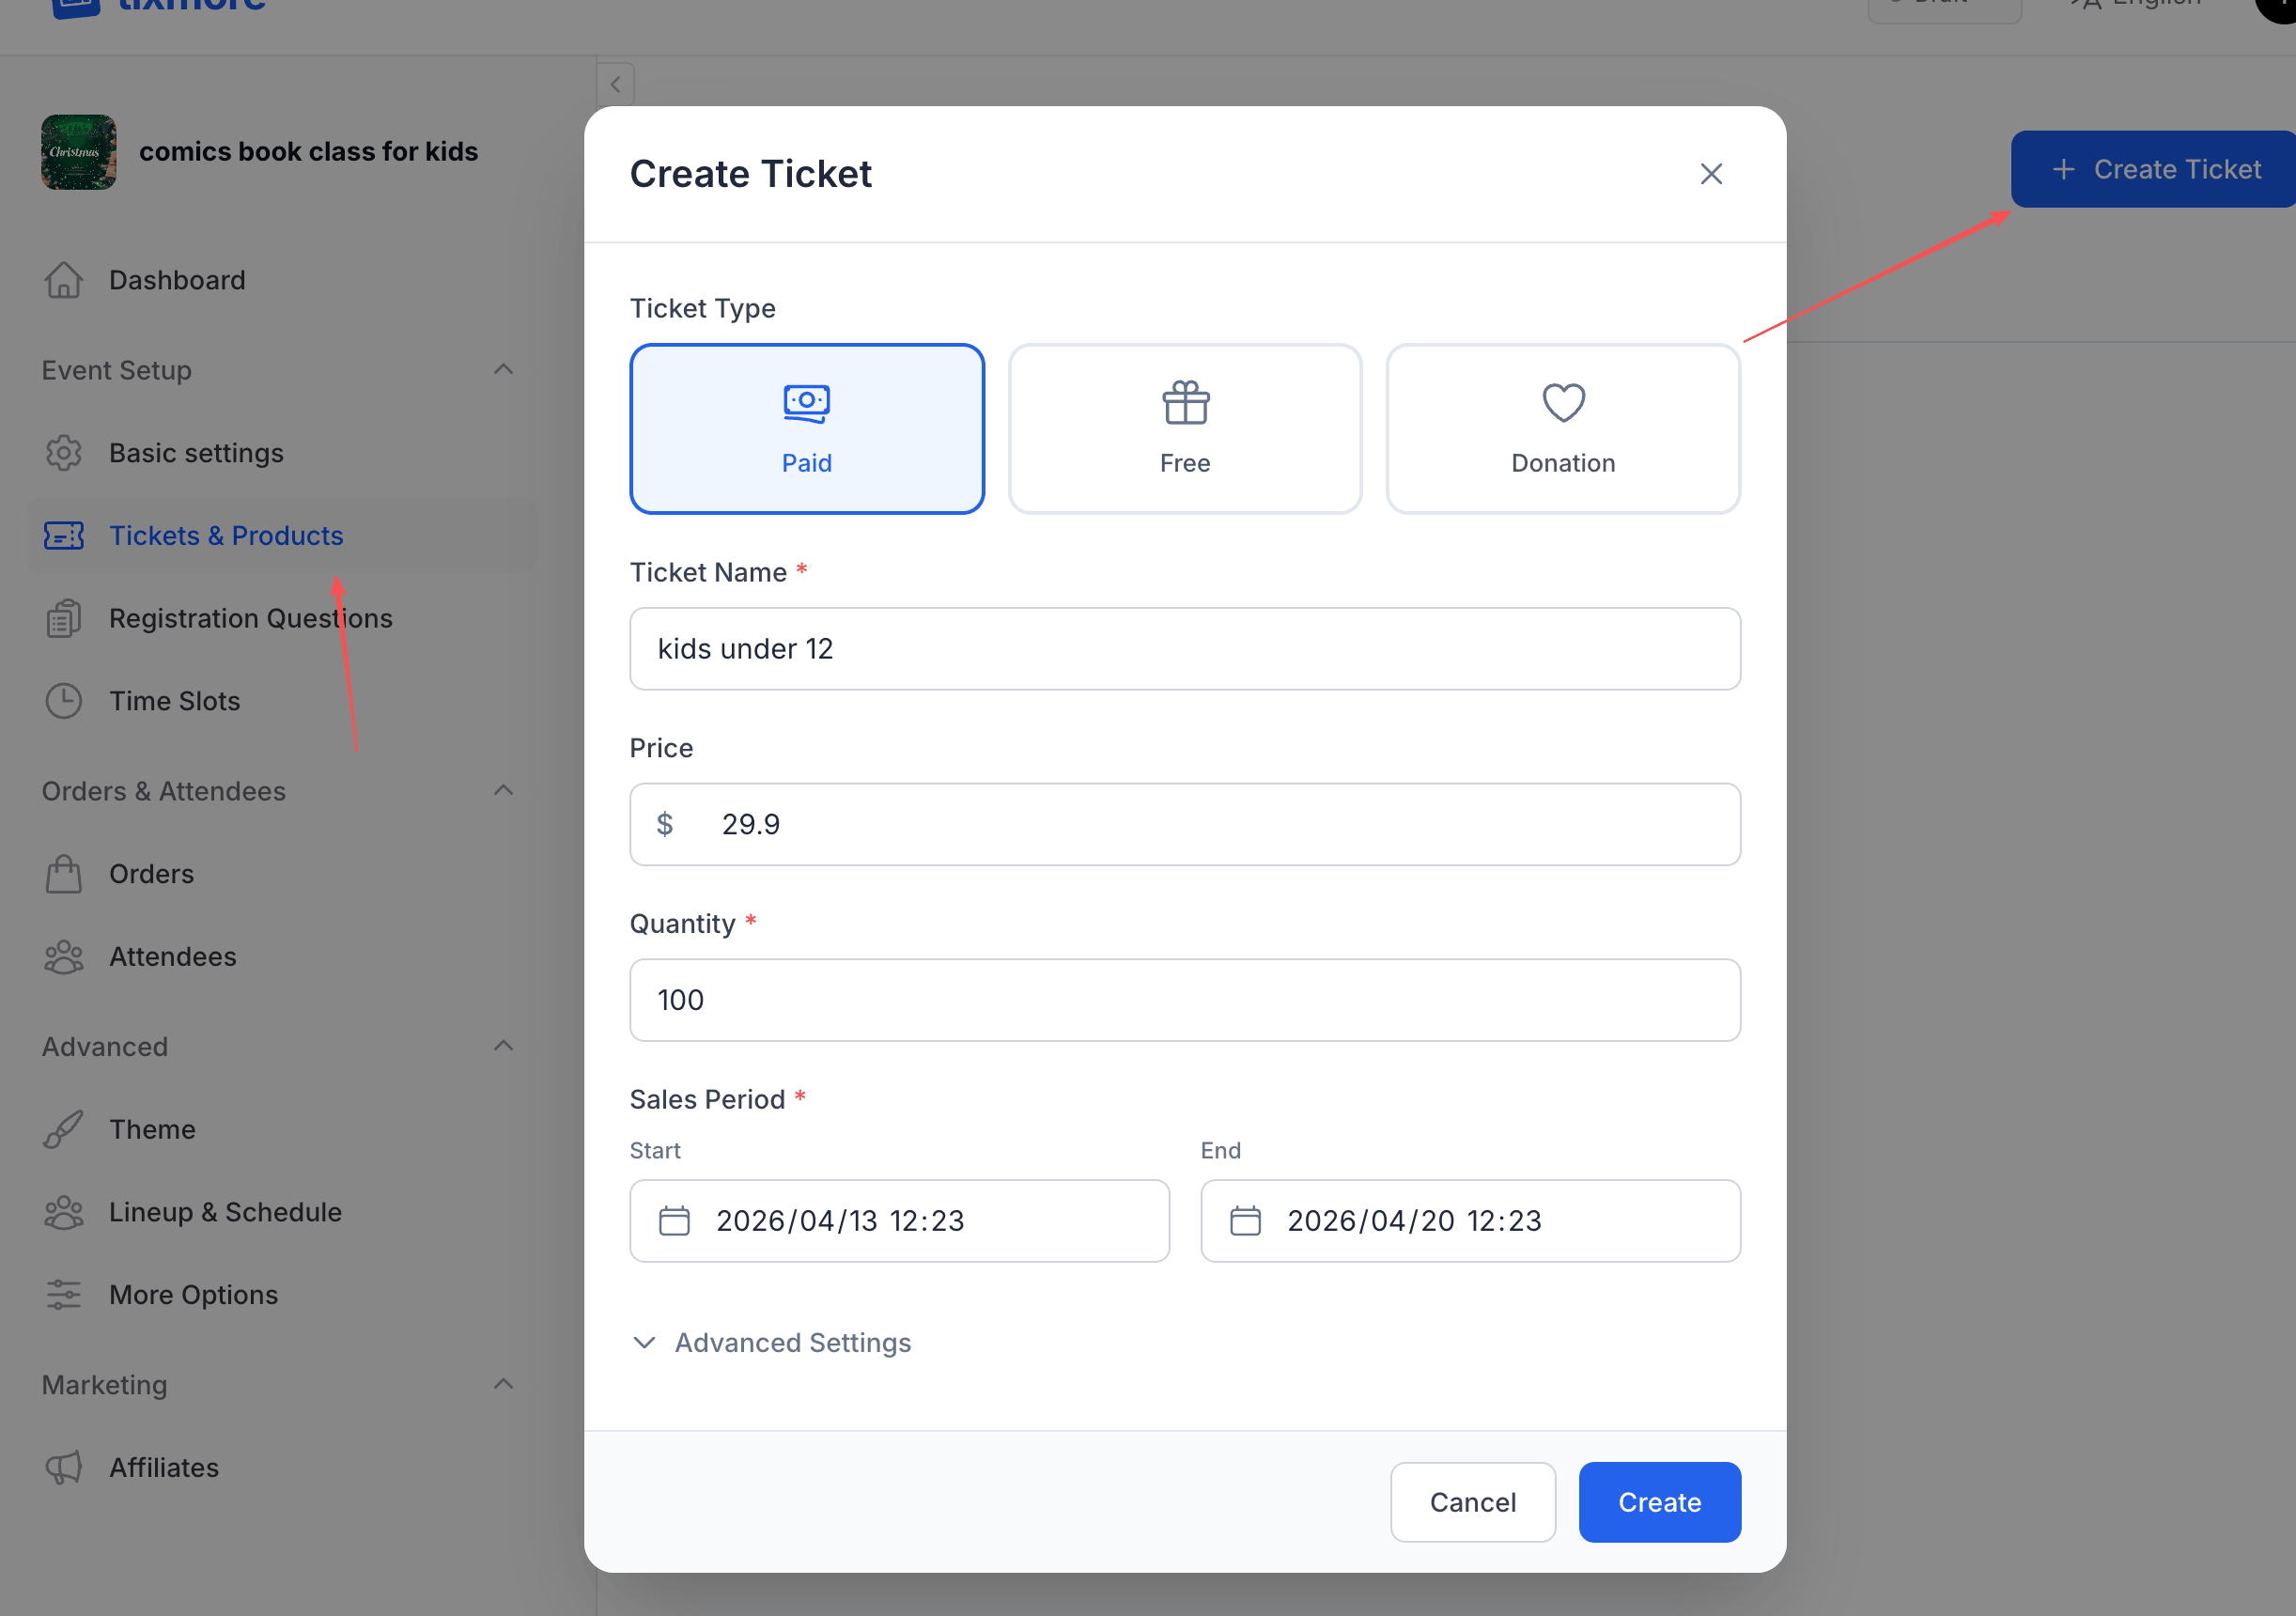
Choose a ticket type:
| Type | Description |
|---|---|
| Paid | Attendees pay the price you set. Revenue goes to you (minus applicable fees). |
| Free | No charge — great for community events, open meetups, or free tiers. |
| Donation | Attendees choose how much to pay. Perfect for charity events or "pay what you can" models. |
Fill in the details:
- Ticket Name — e.g., "General Admission", "VIP", "Kids under 12"
- Price — for paid tickets (in your account currency)
- Quantity — how many tickets are available. Leave unlimited (∞) if you don't have a cap
- Sales Period — when ticket sales open and close. Useful for early bird pricing or last-minute cutoffs
Click Advanced Settings if you need to set per-order limits (min/max tickets per order) or other options.
You can create multiple ticket types — for example, a free "General" ticket and a paid "VIP" ticket for the same event.
Step 6: Go Live
Your event starts in Draft status — it's only visible to you. When you're ready for the world to see it, click the "Draft" status badge in the top right corner and select "Publish".

That's it. Your event is now live. The event page URL is shown in your dashboard — copy it, share it, and start selling.
What Happens After Publishing?
- Your event appears on your organizer page
- The event page is publicly accessible and SEO-indexed
- Attendees can start purchasing tickets immediately
- You'll receive email notifications for each new order
- Real-time stats (orders, revenue, page views) start flowing into your dashboard
You can always switch your event back to Draft if you need to make changes before anyone buys tickets. Once tickets have been sold, the event stays active but you can still edit most settings.
Quick Recap
- Events → Create New Event — name, cover, start time
- Basic Settings — add location, description, more images
- Tickets & Products — add at least one ticket
- Draft → Publish — go live
The whole process takes about 5 minutes. Everything else — themes, lineups, schedules, promo codes, affiliates — is optional polish you can add anytime.
Next up: learn how to set up tickets and products in detail, or customize your event page theme — guides coming soon.