Your Organizer Page
Every organizer on Tixmore gets a public profile page — a dedicated landing page that showcases who you are and lists all your upcoming (and past) events in one place. Think of it as your mini-website for events.
Your organizer page lives at a URL like:
https://tixmore.com/o/your-organizer-name
It's the page attendees land on when they want to see "what else this organizer is running." If you host events regularly, this page becomes your brand hub.
Setting Up Your Organizer Page
Where: Account → Organizer Page
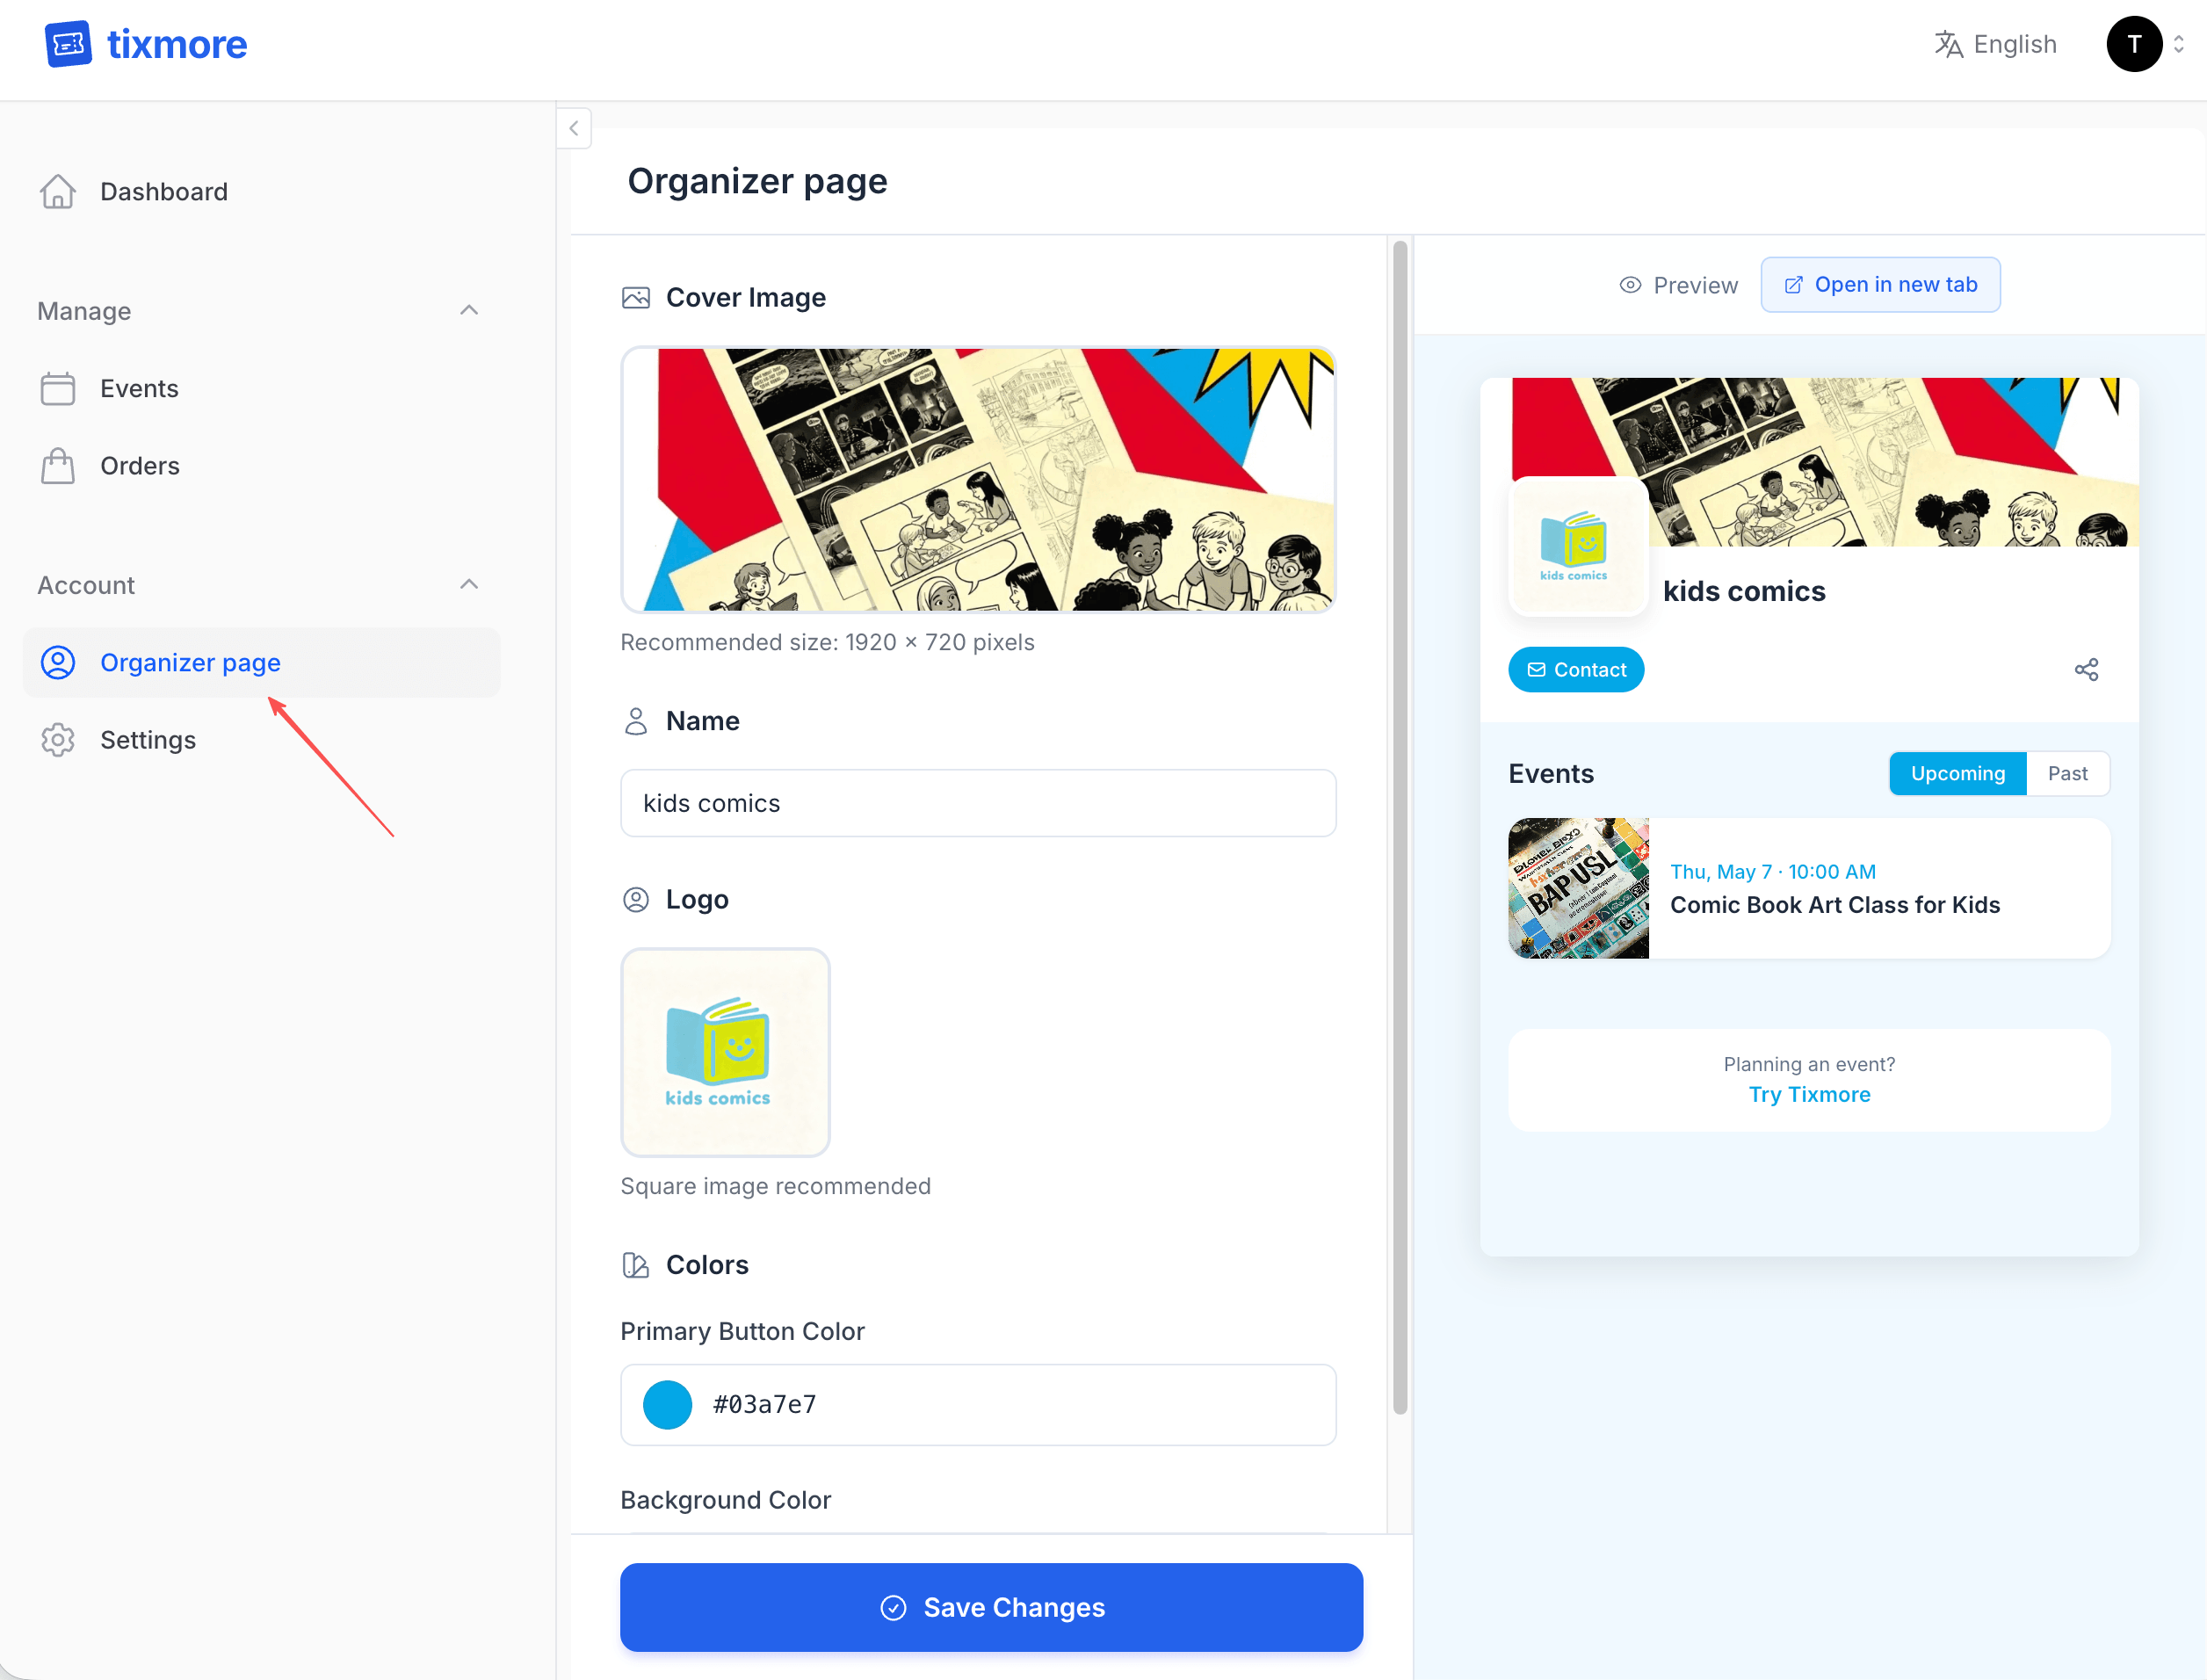
The left side is where you edit, and the right side shows a live preview of how your page will look to attendees. Let's go through each setting.
Cover Image
This is the large banner image at the top of your organizer page. It's the first thing people see, so make it count.
- Recommended size: 1920 × 720 pixels
- Format: JPG or PNG
- Tips:
- Use a high-quality photo from one of your past events, or a branded banner
- Avoid text-heavy images — they don't scale well on mobile
- If you don't upload one, the page will show a default gradient background
Name
Your organizer name — this is displayed prominently on the page and also used as the page title for SEO. Keep it short, recognizable, and consistent with your brand elsewhere.
A few things to consider:
- This is not your login username — it's your public-facing brand name
- It appears on every event page you create (in the "Organized by" section)
- Changing it updates everywhere immediately
Logo
Your logo appears as a small avatar next to your organizer name and on your event pages. It helps attendees recognize your brand at a glance.
- Square image recommended — it will be displayed in a circular or rounded frame
- Keep it simple — logos with fine detail may not be legible at small sizes
- If you don't upload a logo, a default placeholder will be shown
Colors
You can customize two colors to match your brand:
Primary Button Color
- This controls the color of the "Contact" button and other interactive elements on your organizer page
- Enter a hex color code (e.g.,
#03a7e7) or use the color picker - Default: Tixmore blue (
#2563eb)
Background Color
- Sets the overall background tone of your organizer page
- Use a light, subtle color that complements your cover image
- Default: light blue (
#f0f9ff)
Pick colors that match your event branding. When attendees navigate from your organizer page to an event page, consistent colors build trust and make the experience feel polished.
What Attendees See
Your organizer page automatically displays:
- Your cover image, logo, and name at the top
- A "Contact" button linking to your email (set in your account profile)
- A share button so visitors can share your page
- Upcoming events — all your published events sorted by date, with cover images and key details
- Past events — a tab showing events that have already ended
You don't need to manually add events to this page — any event you publish automatically appears here.
Preview & Open in New Tab
Use the Preview panel on the right side to see how your changes look in real time. When you're happy with the result, click "Open in new tab" to see the full page as your attendees would.
When to Use Your Organizer Page
- In your social media bio — Link to your organizer page instead of individual events. Attendees will always see your latest offerings.
- In email signatures — A professional touch that shows all your events at a glance.
- Repeat event promotion — If you run recurring events (weekly meetups, monthly workshops), your organizer page is a natural "home base" for your audience.
- Multi-event festivals — If you're running multiple events under one brand, the organizer page ties them together.
Once your organizer page is set up, every new event you publish will automatically appear there. It's a set-it-and-forget-it kind of setup — spend a few minutes getting it right, and it works for you from then on.
Need help with your organizer page? Email us at [email protected].